How to Edit Schedule Templates (Add, Delete, and Modify Shifts)
This guide provides a straightforward approach to editing schedule templates, allowing users to efficiently add, delete, and modify shifts. Because these edits are made on a Schedule Template, the changes will apply to any future weeks where the template is used—saving schedulers time and headaches in the long run.
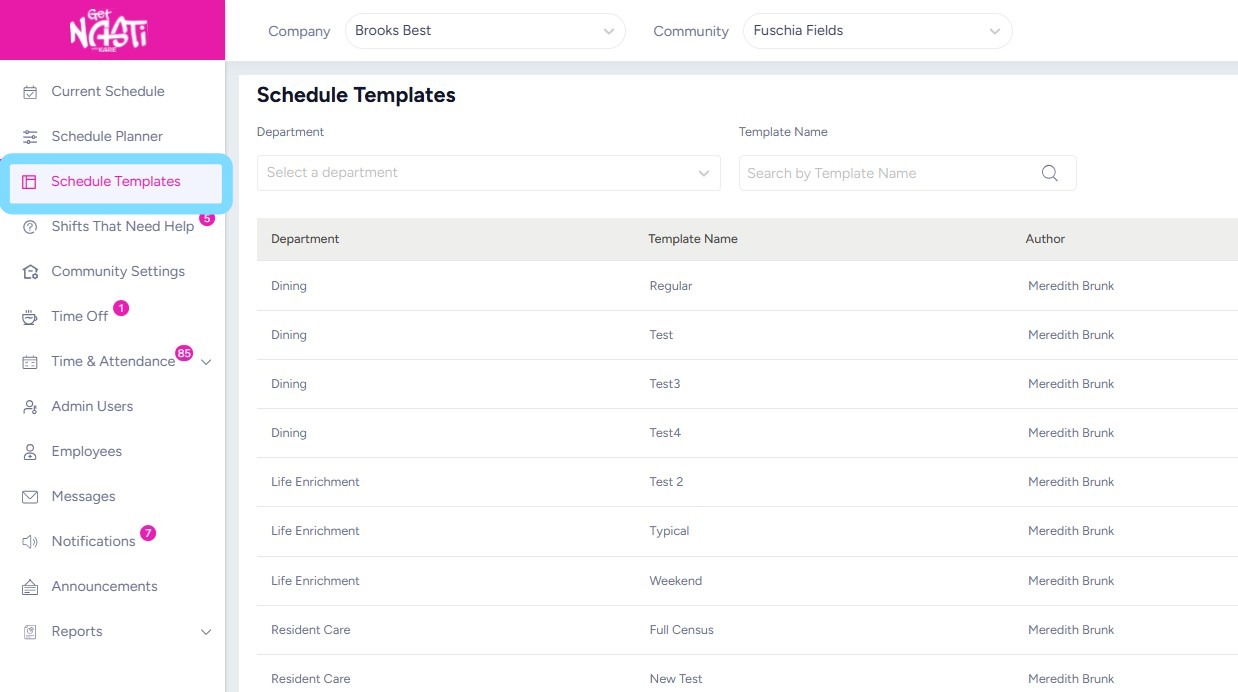
1. Navigate to Schedule Templates
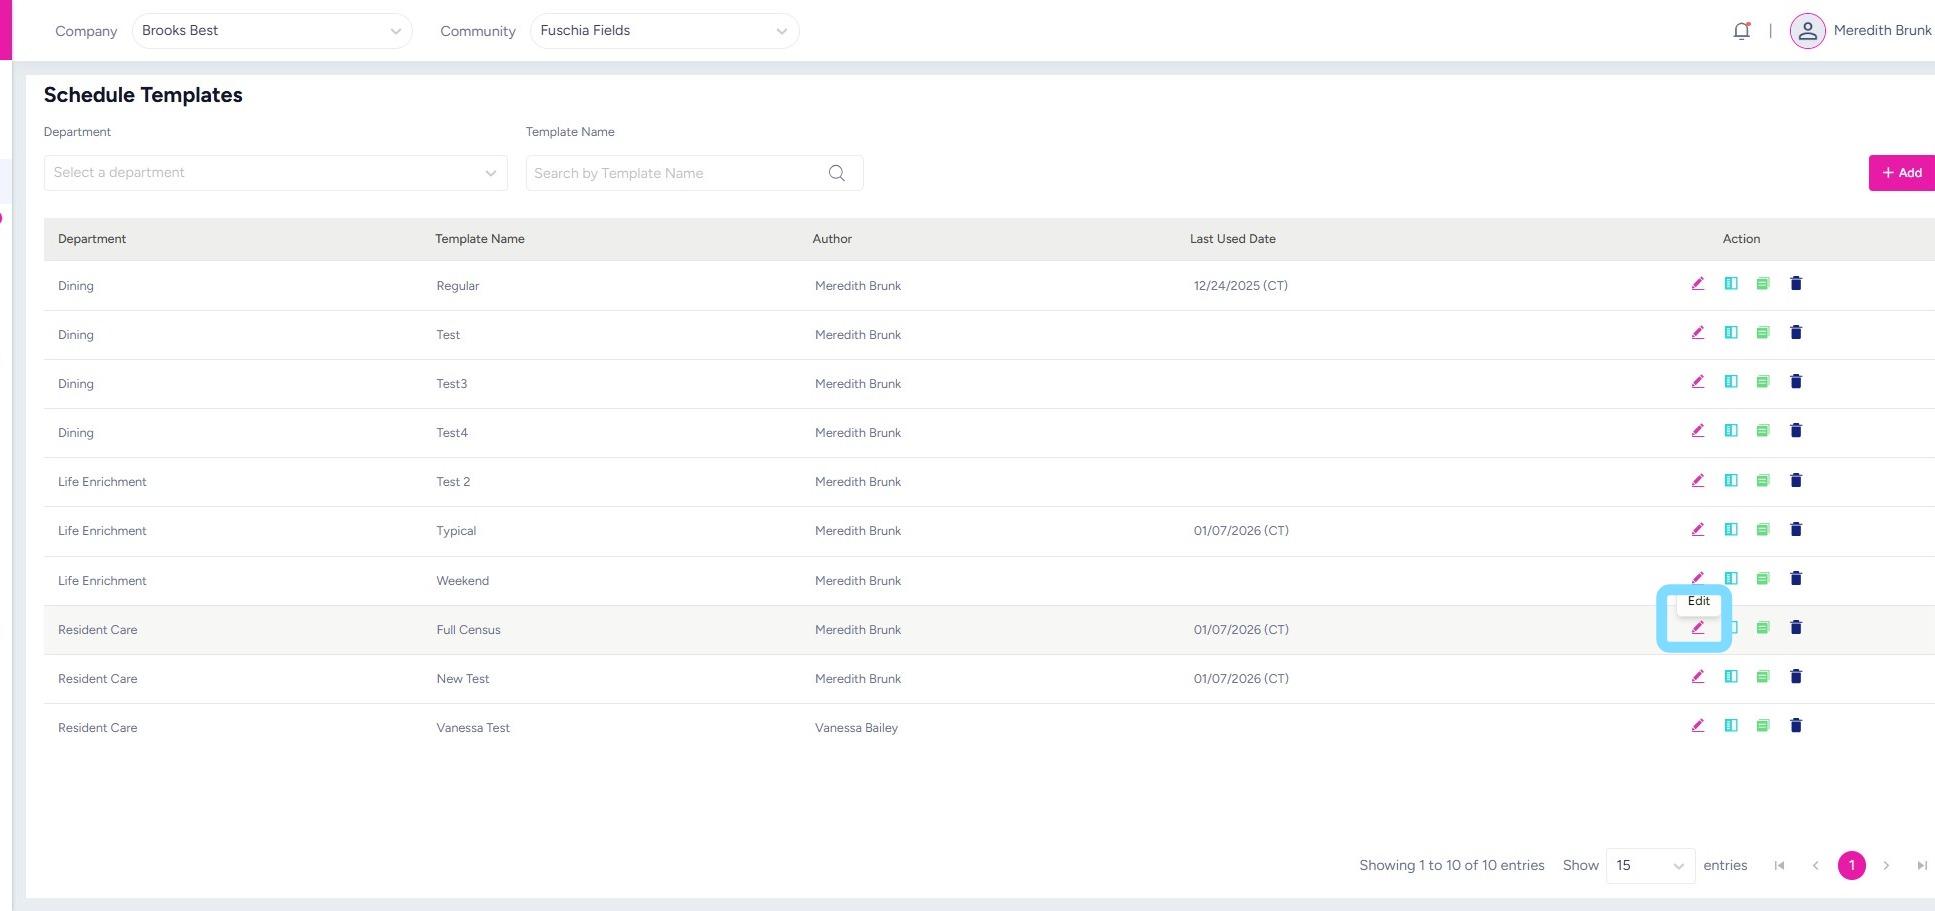
2. Find the template to be edited and select the Edit icon
3. To edit shifts on a template:
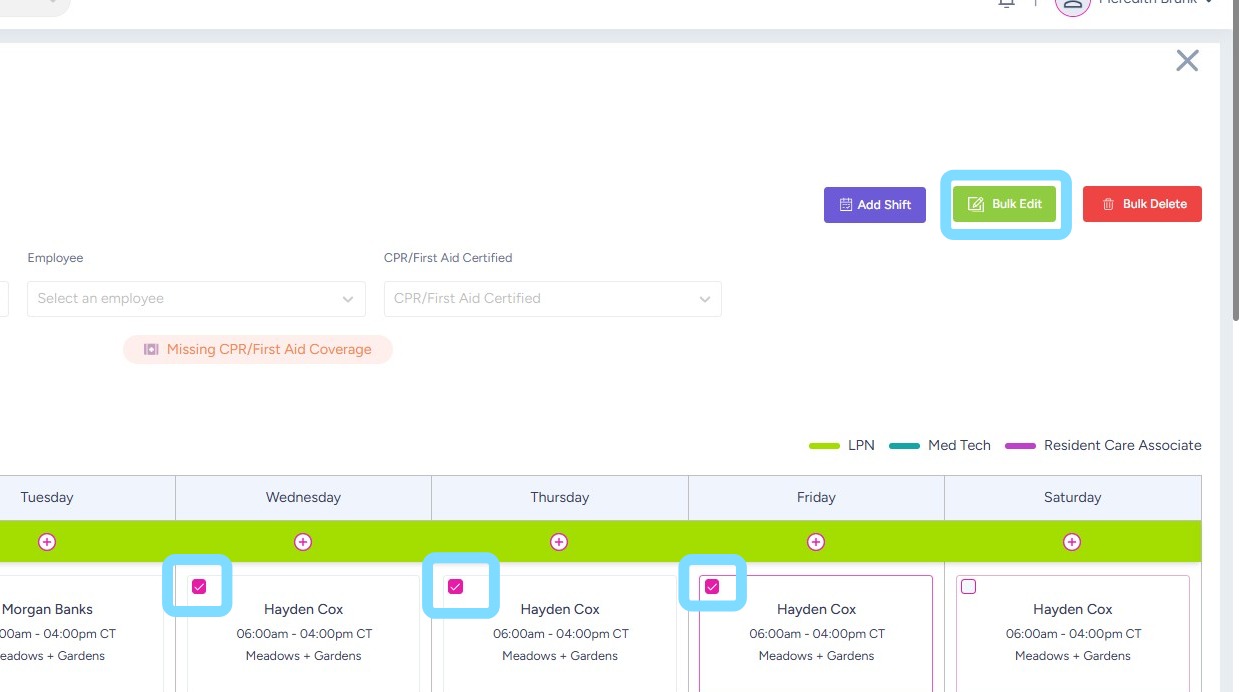
Check the boxes for the shift(s) to be edited
Select Bulk Edit to edit shifts.
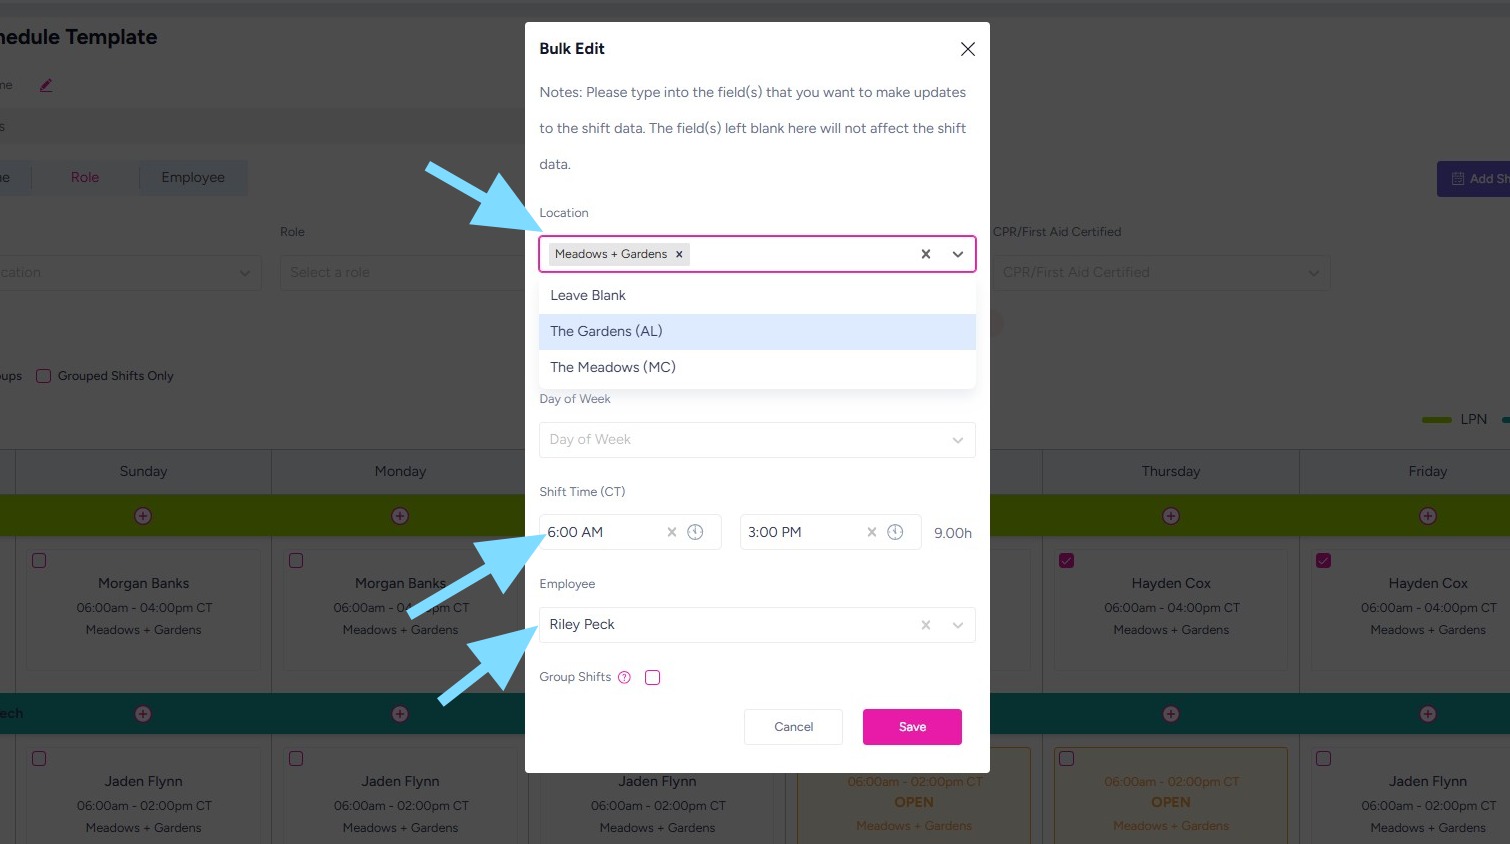
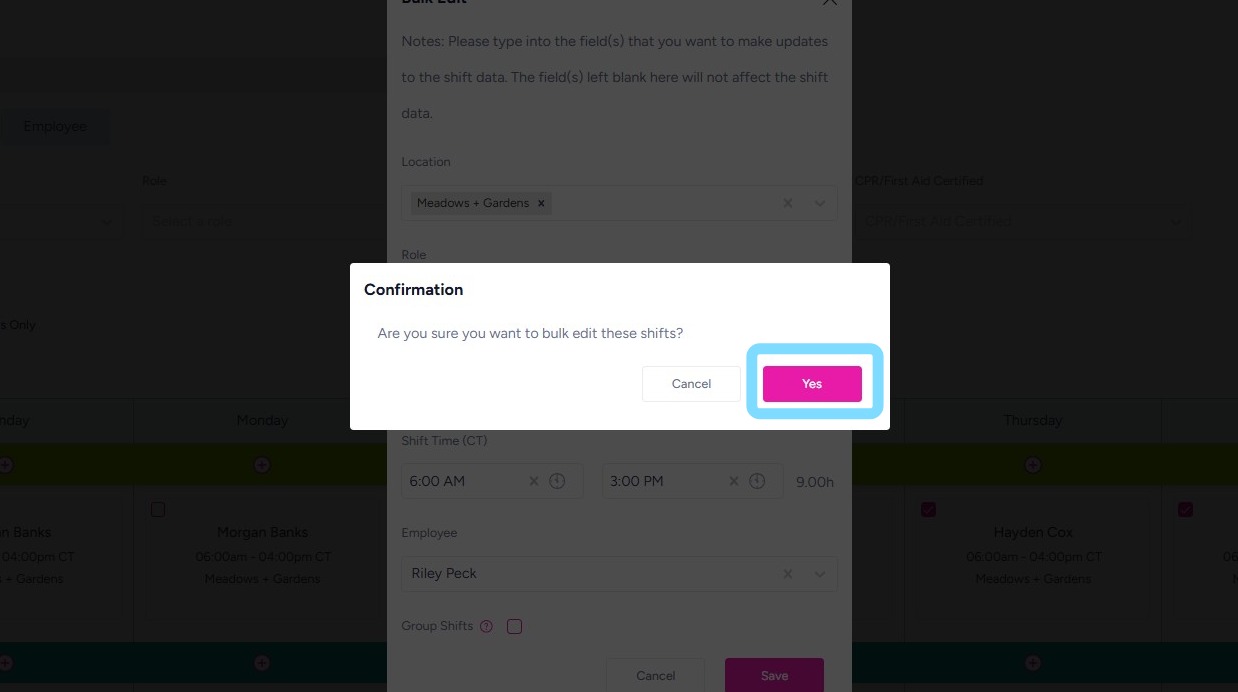
4. Make edits to the shift(s) as needed.
In this example, the Shift Time, Employee, and Location were updated.
5. Select Yes to confirm editing of shift(s).
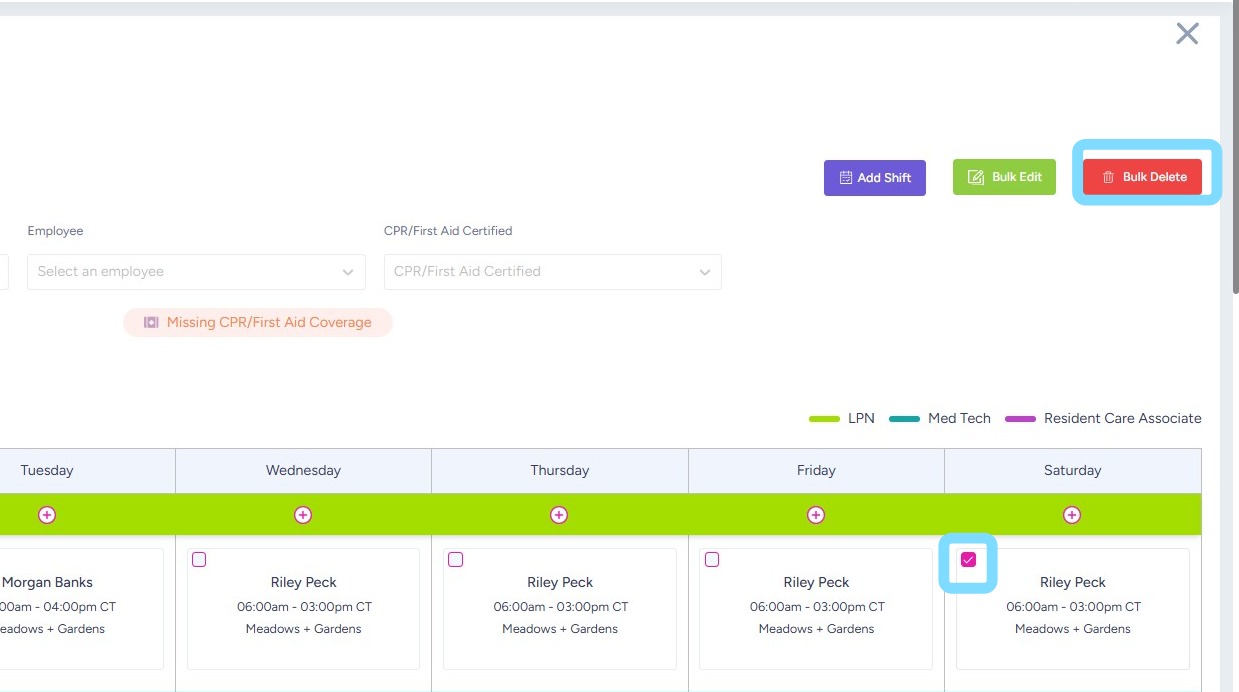
6. To delete shifts from a template:
Select the box for the shift(s) to be deleted
Select Bulk Delete.
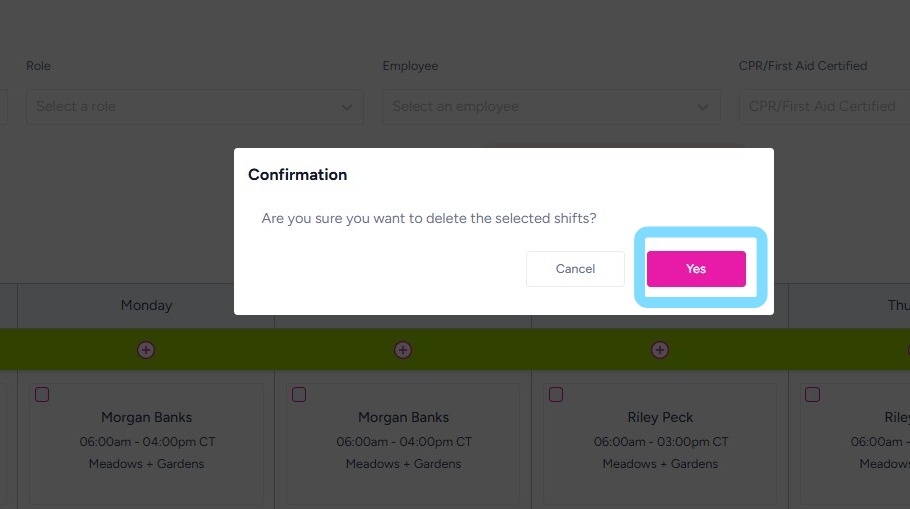
7. Select Yes to confirm deletion of shift(s).
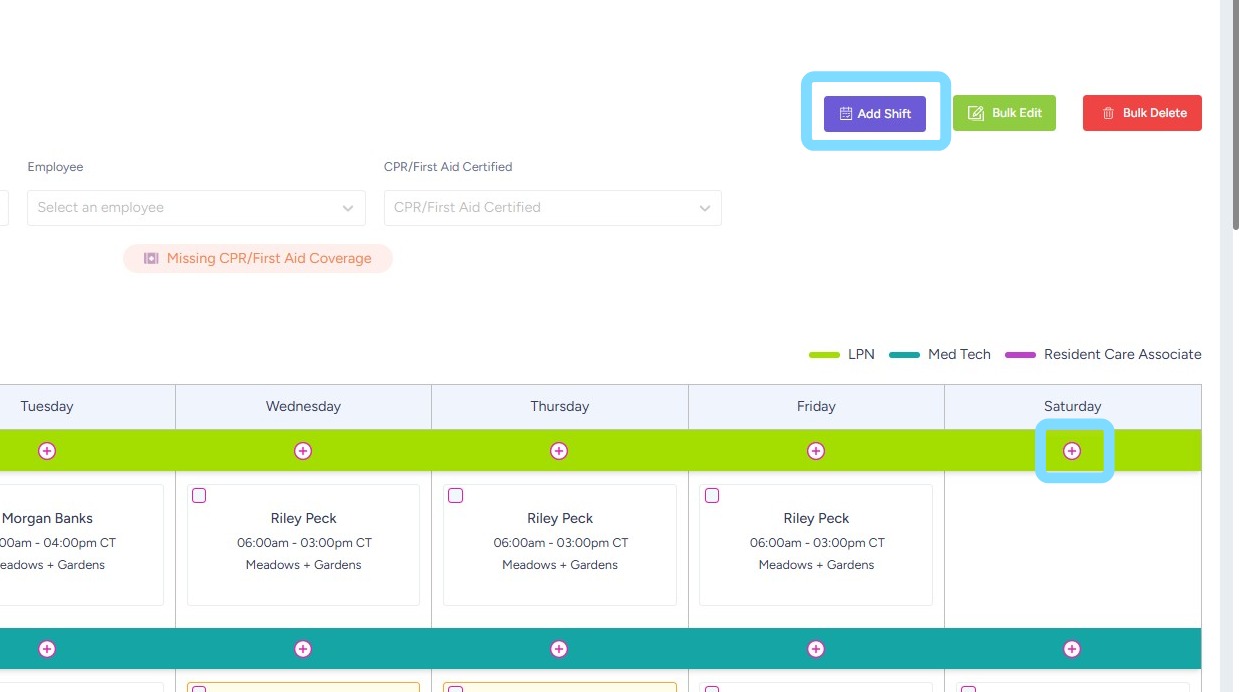
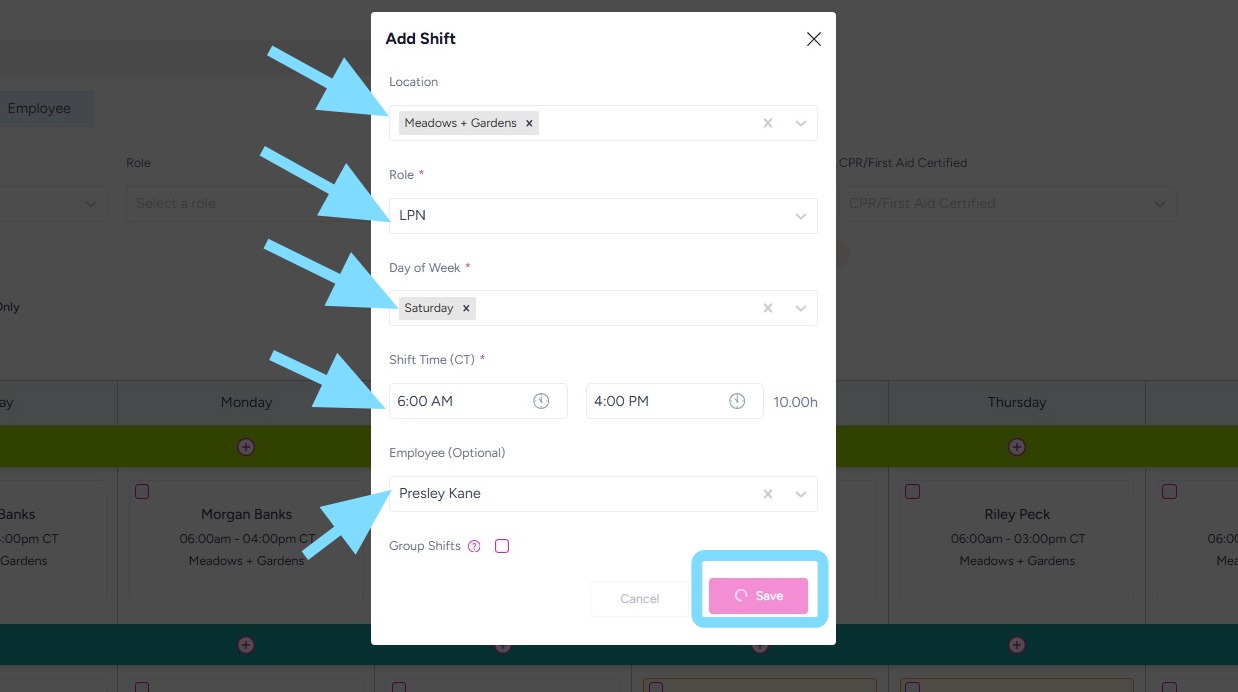
8. To add shifts to a template:
Select + icon or Add Shift
9. Select Role, Day(s) of Week, and Shift Time, Location** and Employee**
Select Save.
**Note: The Location and Employee fields are optional to fill in. Location may be left blank if the scheduler does not wish to attach a particular location to the shift. The Employee may be left blank/unassigned if the employee assignment is unknown or the scheduler wants to leave the shift open on the Schedule Template.
10. Congrats, you now know how to edit, add, and delete shifts within a template! Remember that these changes will now apply to any future weeks where this template is used.