How to Create a Schedule Template
Schedule Templates take the grind out of scheduling by providing reusable, department-specific blueprints with roles, locations, days, and times already built in. Templates lock in your staffing structure while keeping the flexibility to assign or reassign employees later. Once created, templates allow you to apply and publish schedules weeks in advance—turning hours of work into minutes – freeing you up to focus on leading your team and supporting residents.
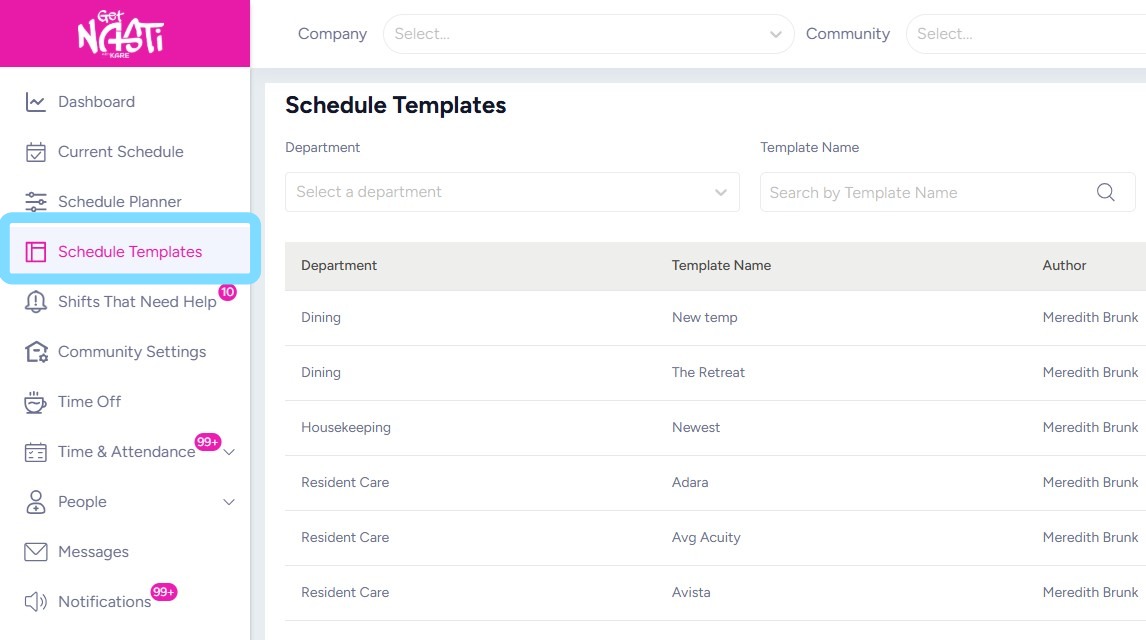
1. Navigate Schedule Templates
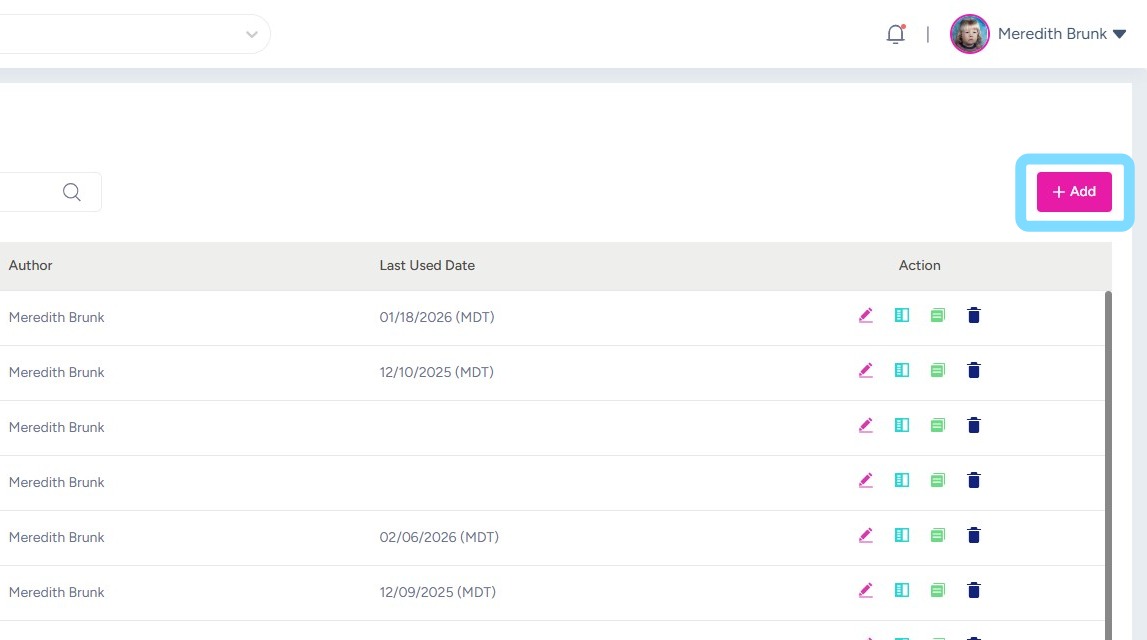
2. Select +Add
3. You are able to build a template for 1 or more weeks.
- Select the department from the dropdown for which you are creating this template.
- Enter a template name.
- Select the number of weeks the template will cover.
- Click Save.

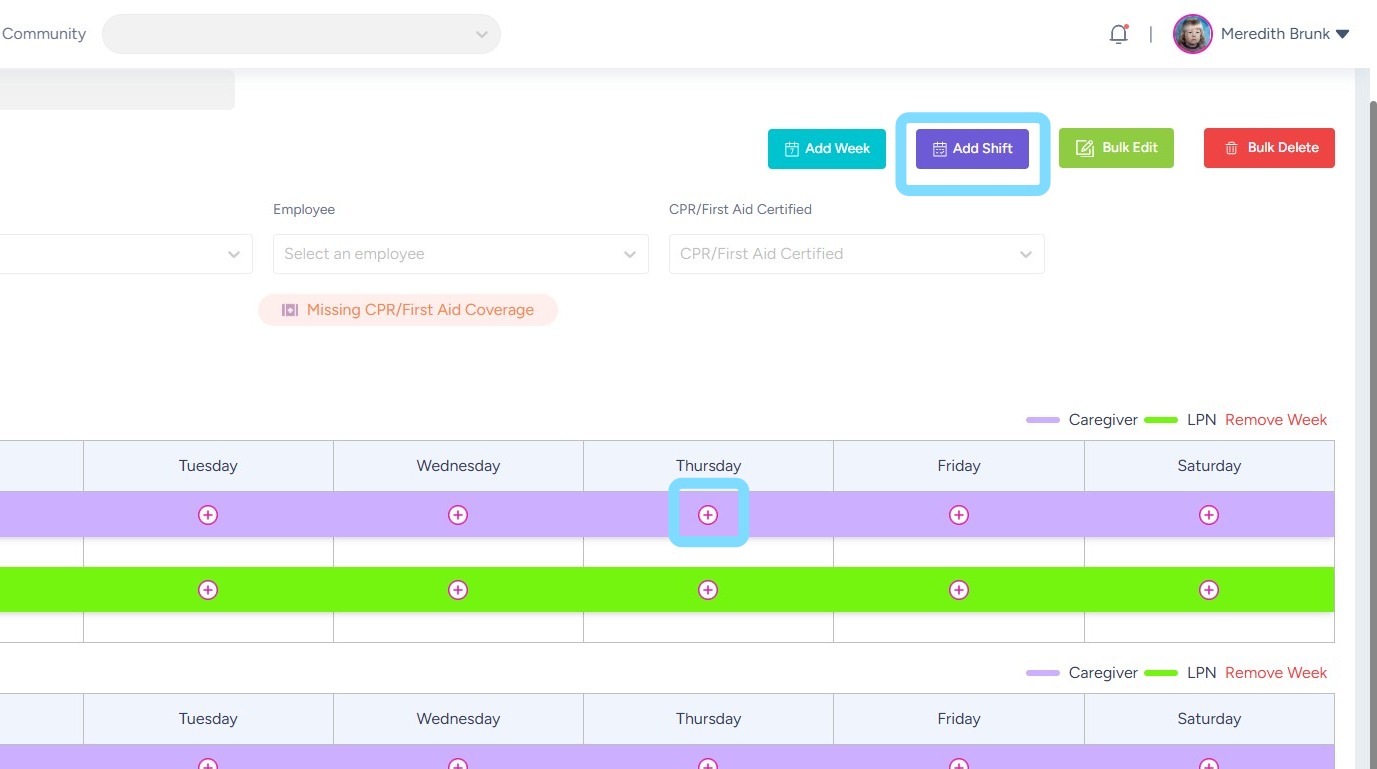
4. Now build your template by adding shifts into the template.
You may add shifts in two ways:
- Select Add Shift
- Select + icon under a day of the week
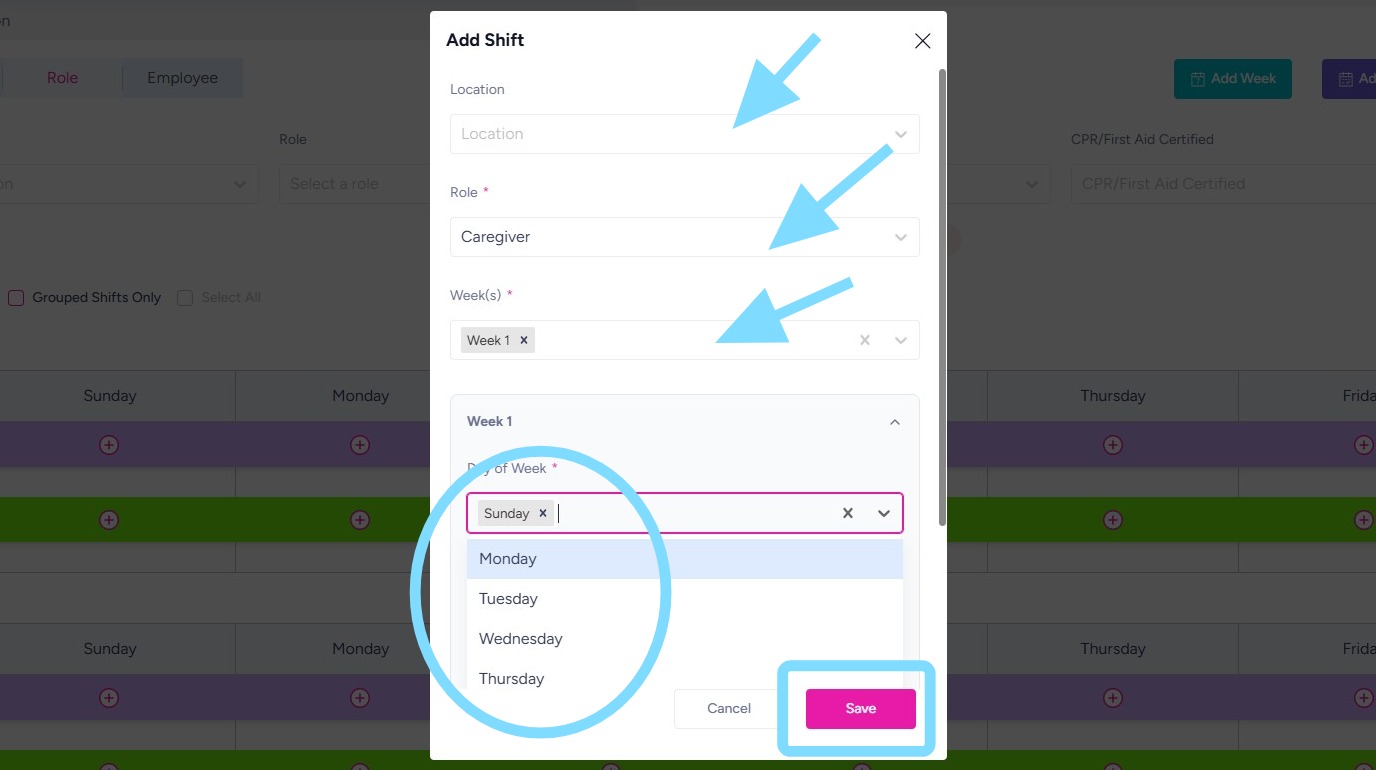
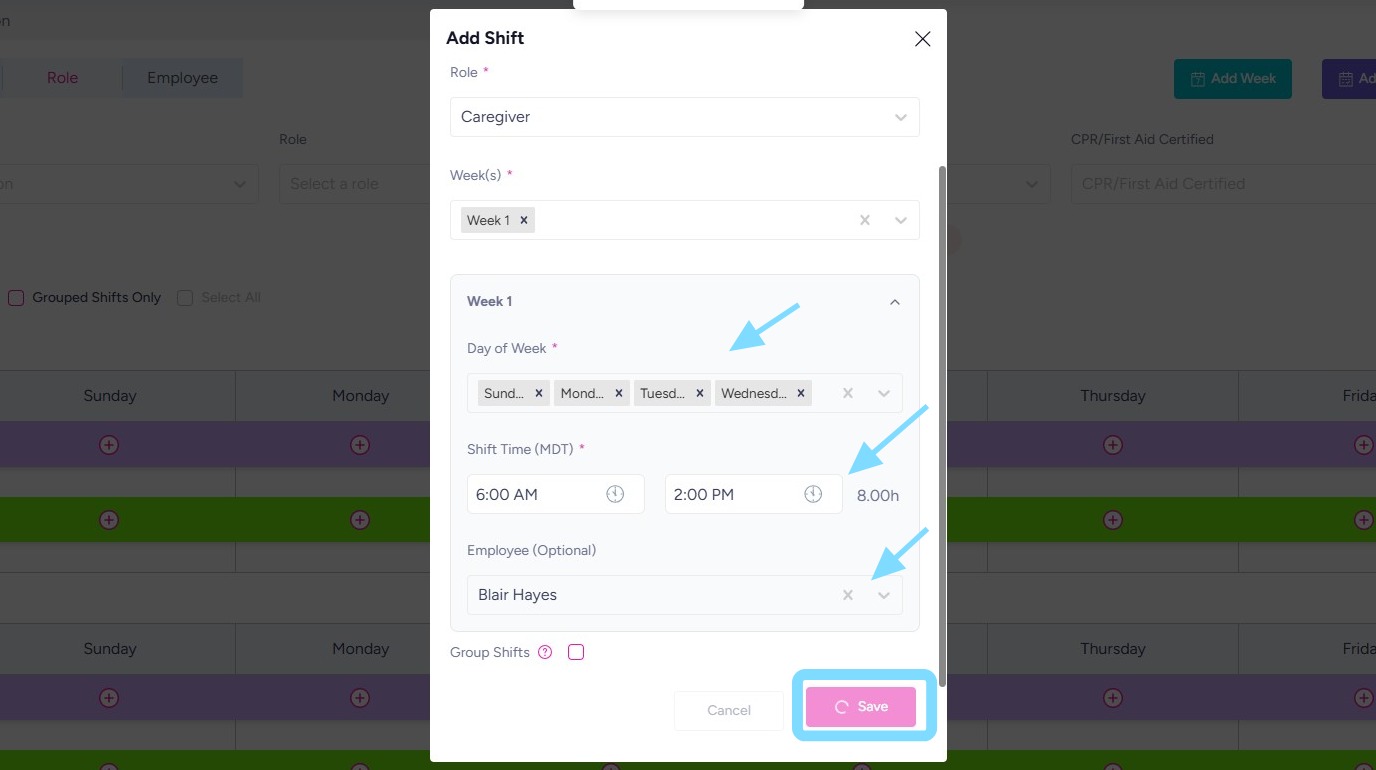
5. Now complete the details for these shifts:
-
Now complete the details for these shifts:
-
Location (optional) – Select the location from the dropdown list.
-
Role – Choose the role these shifts are for.
-
Week(s) – Select the week(s) you want to add shifts to.
-
For each selected week, enter the shift details:
-
Day(s) of the week
-
Shift time(s)
-
Employee (optional) – Assign an employee now, or leave unassigned to keep the shifts open in the schedule template.
-
-
Select Save to add the shifts to your template.
-
6. In this example, for Week 1, we’re adding shifts on Sunday, Monday, Tuesday, and Wednesday from 6:00 AM to 2:00 PM and have assigned the shifts to employee Blair Hayes.
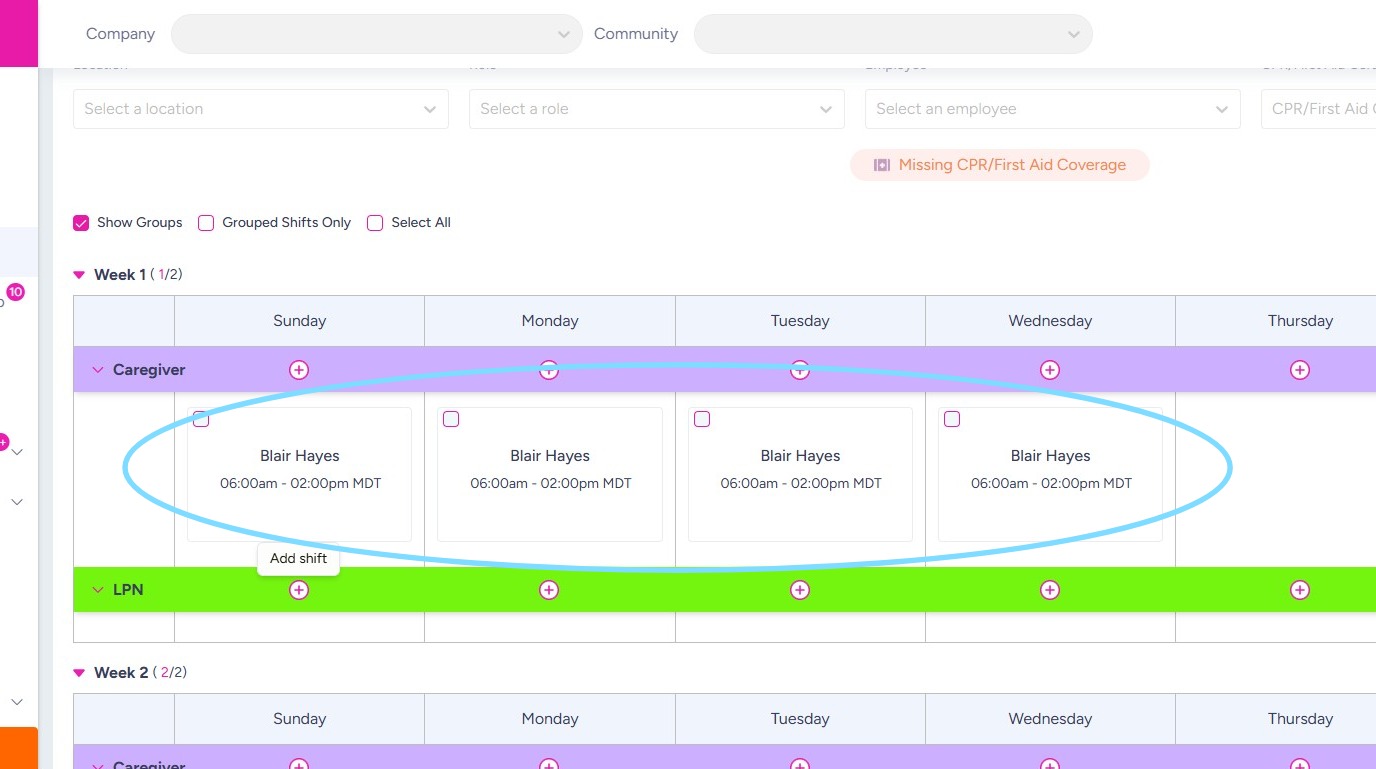
7. Now you’ll see the shifts added to the schedule template.
Continue to build out your template and add shifts by repeating the above steps.
8. To delete shifts on a template, check the box within the shift(s) to be deleted.
Select Bulk Delete.

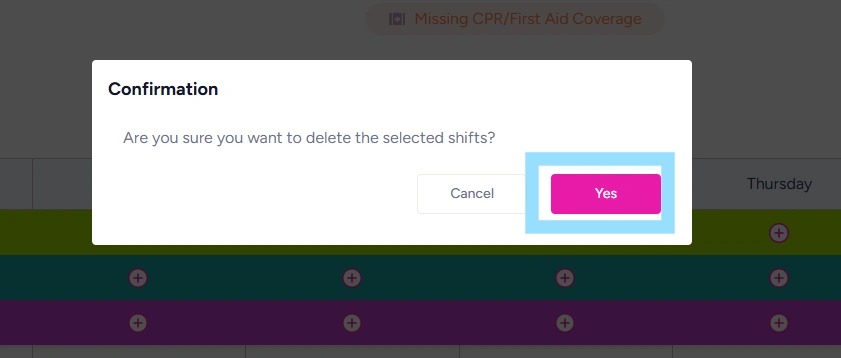
9. Select Yes to confirm deletion of shift(s).
10. To edit shifts within a template, check the box within the shift(s) to be edited.
Select Bulk Edit.
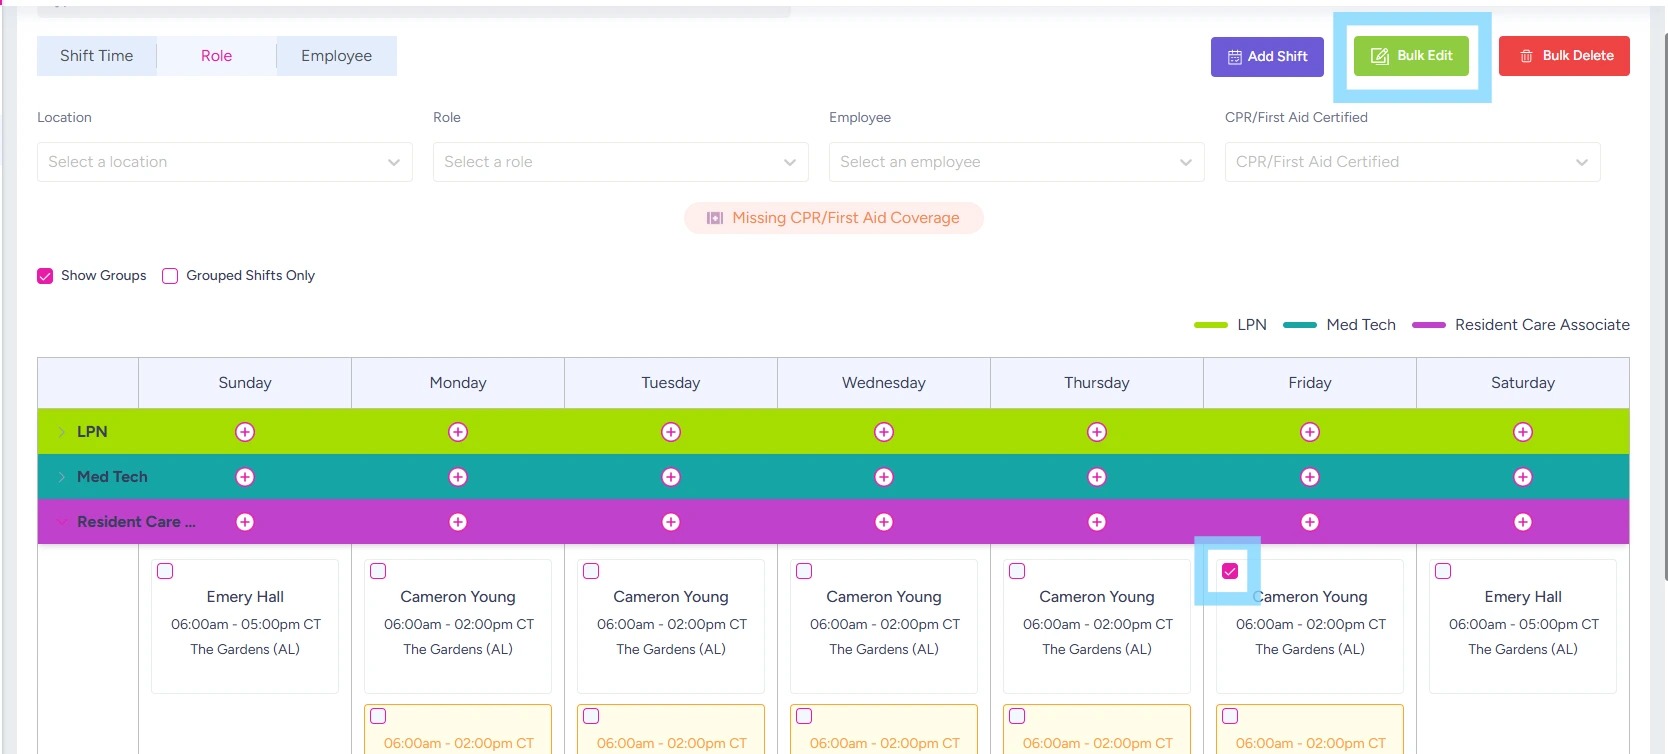
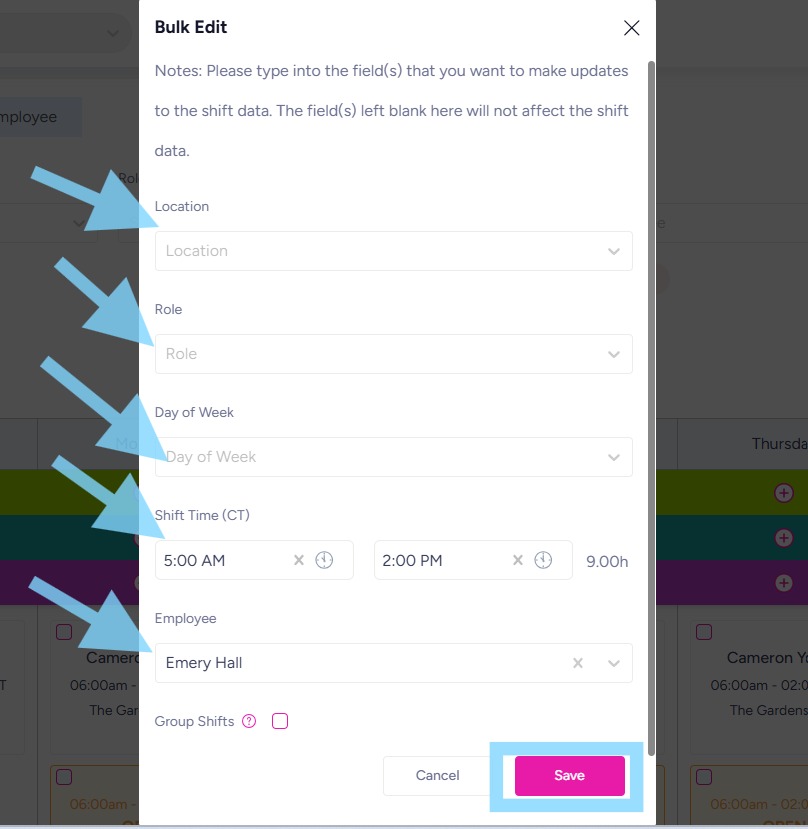
11. Edit any component of the shift, including Location, Role, Day of Week, Shift Times and Employee. In this example, the Shift Times and Employee assignment are modified.
Select Save.
12. CONGRATS – your template is ready!! You may continue creating additional templates. Once you have your templates ready, it just takes a few clicks to apply them to weeks ahead and publish them! See User Guide – Publish a Schedule.