How to Add and Track Agency Coverage
Made by Meredith Brunk with Scribe
This guide explains how to register a new agency within your community and designate agency staff to shifts on your schedule. By following these steps, you can maintain visibility into agency coverage, ensure schedule accuracy, and support compliance requirements.
Agency Settings Configuration
1. Before assigning open shifts to agency staff, Allow Staffing Agency must be enabled for your community.
a. Navigate to Community Settings.
b. Select Schedule Rules.
c. Scroll to the bottom of the page.
d. Enable the Staffing Agency setting by selecting Yes.
e. Select Save to ensure the update is saved.
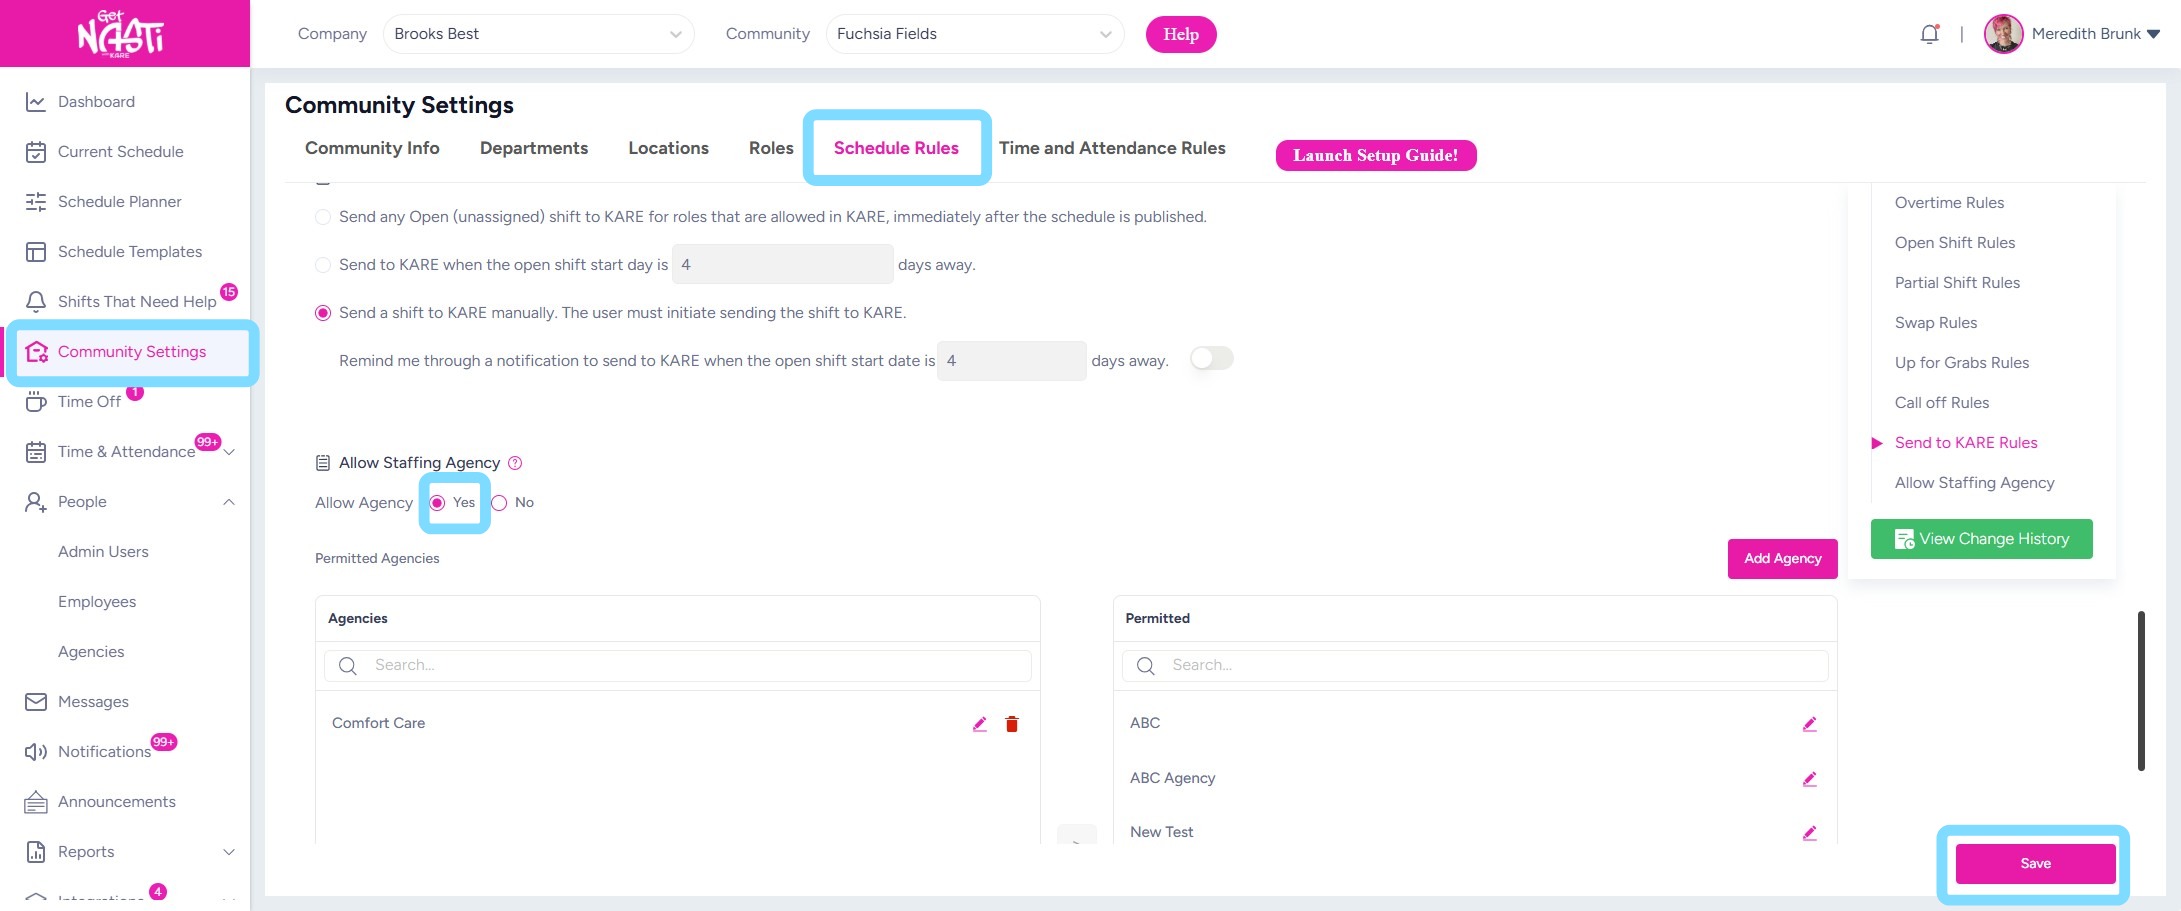
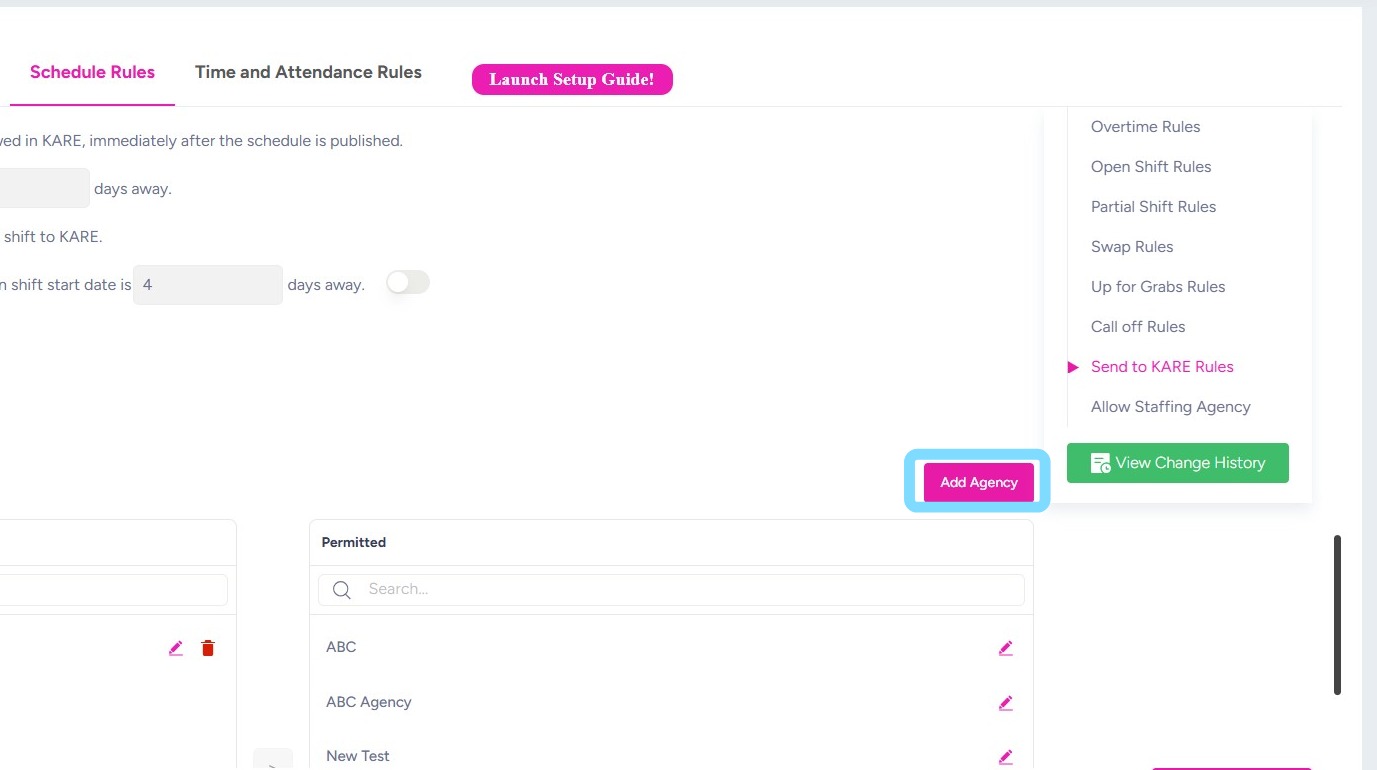
2. Now that Staffing Agency has been enabled, you’ll need to add the agencies your community utilizes. Once added, these agencies will be available as an assignment option for open shifts.
Select Add Agency
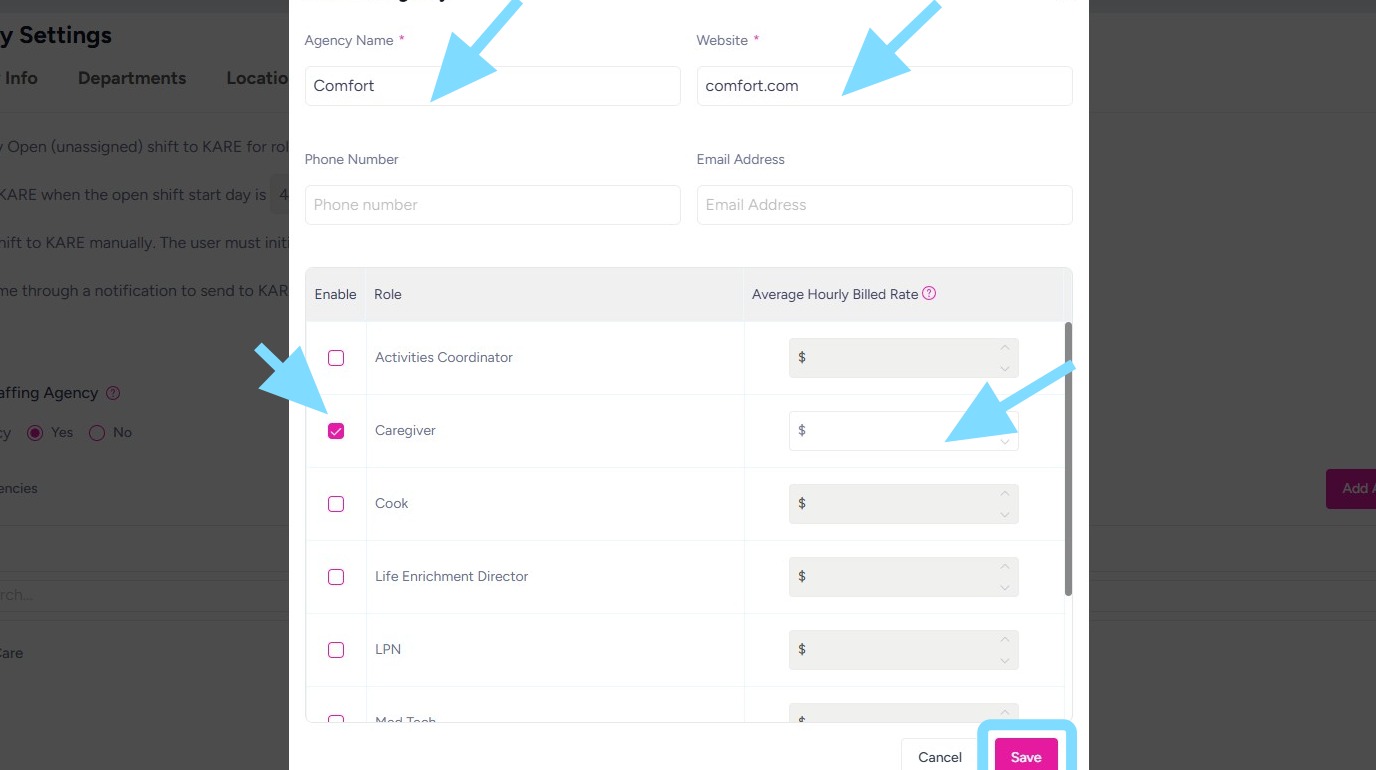
3. a. Enter the Agency Name.
b. Enter the agency’s Website.
c. Select the roles that can be filled by this agency by checking the appropriate boxes.
d. Enter the agency’s average hourly billed rate.
e. Select Save.
Worker Assignment and Publishing
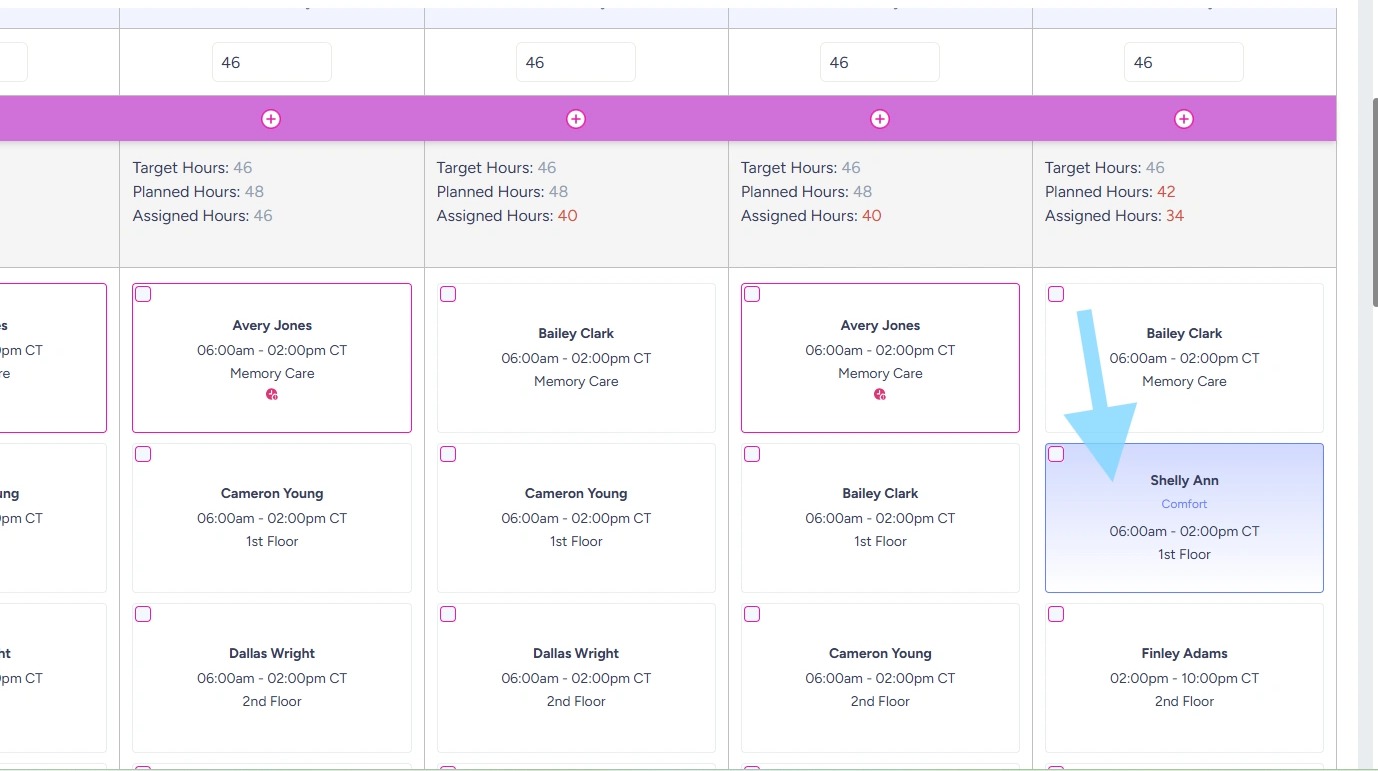
4. Now you’re able to designate open shifts to agency workers.
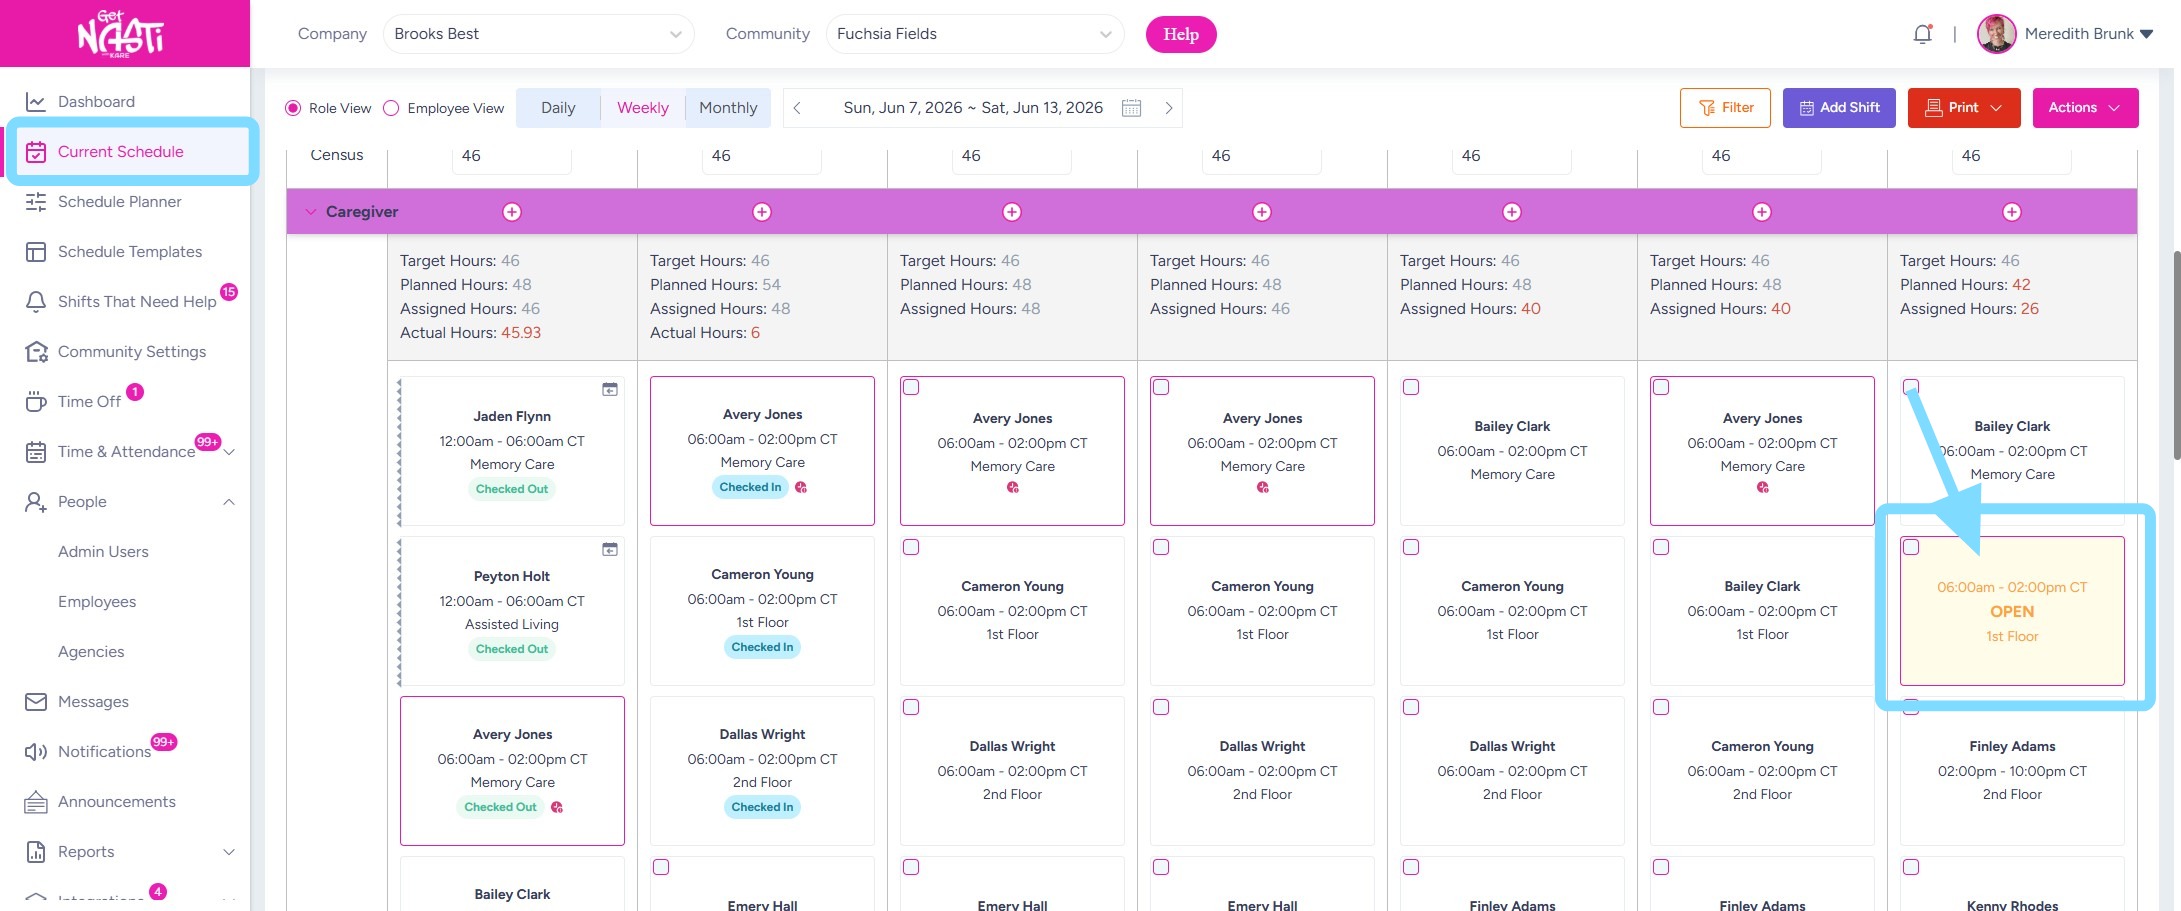
Navigate to Current Schedule
Select shift to be assigned
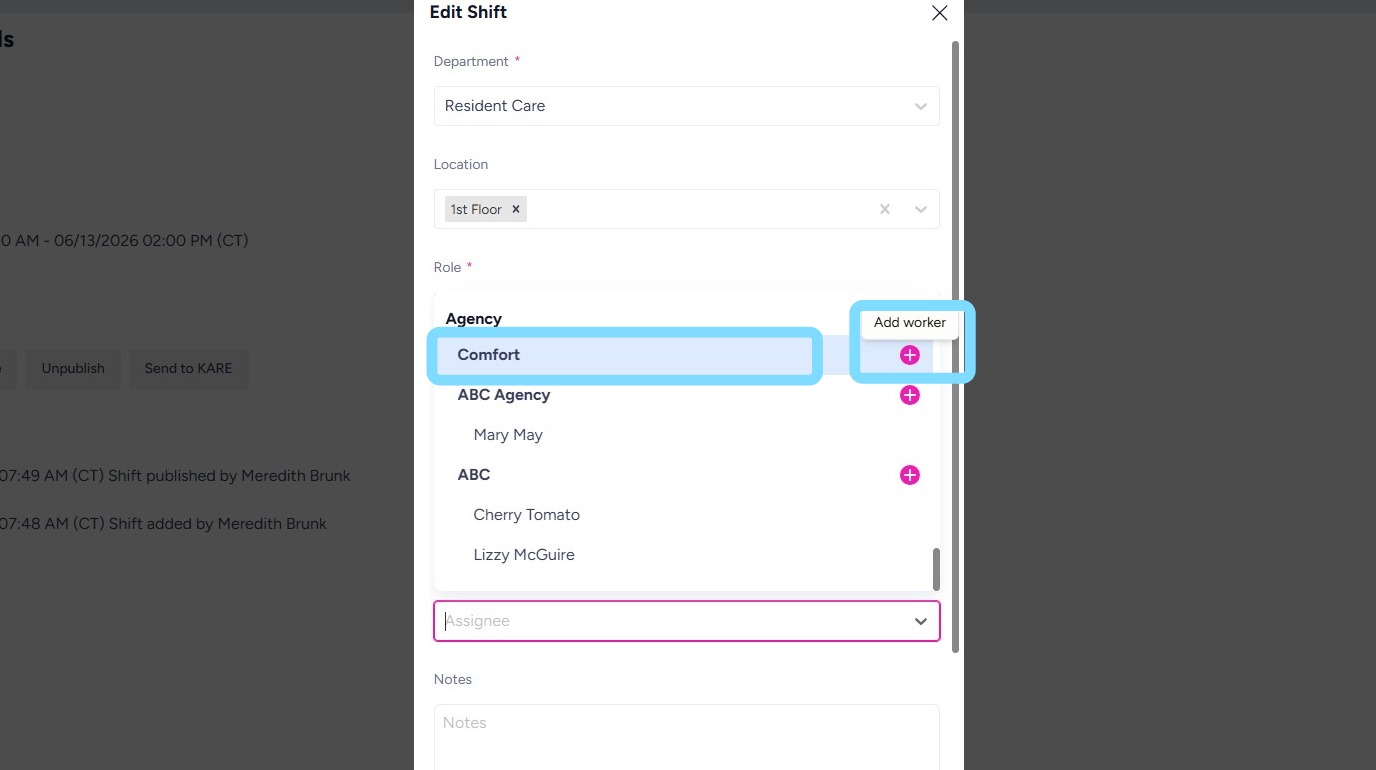
5. Select the Assignee dropdown and scroll to the bottom of the list to view available agencies and agency staff.
To assign an existing agency staff member to the shift, select their name. If the staff member has not yet been identified, select the agency name to assign the shift to the agency.
To add a new agency staff member, select the + icon.
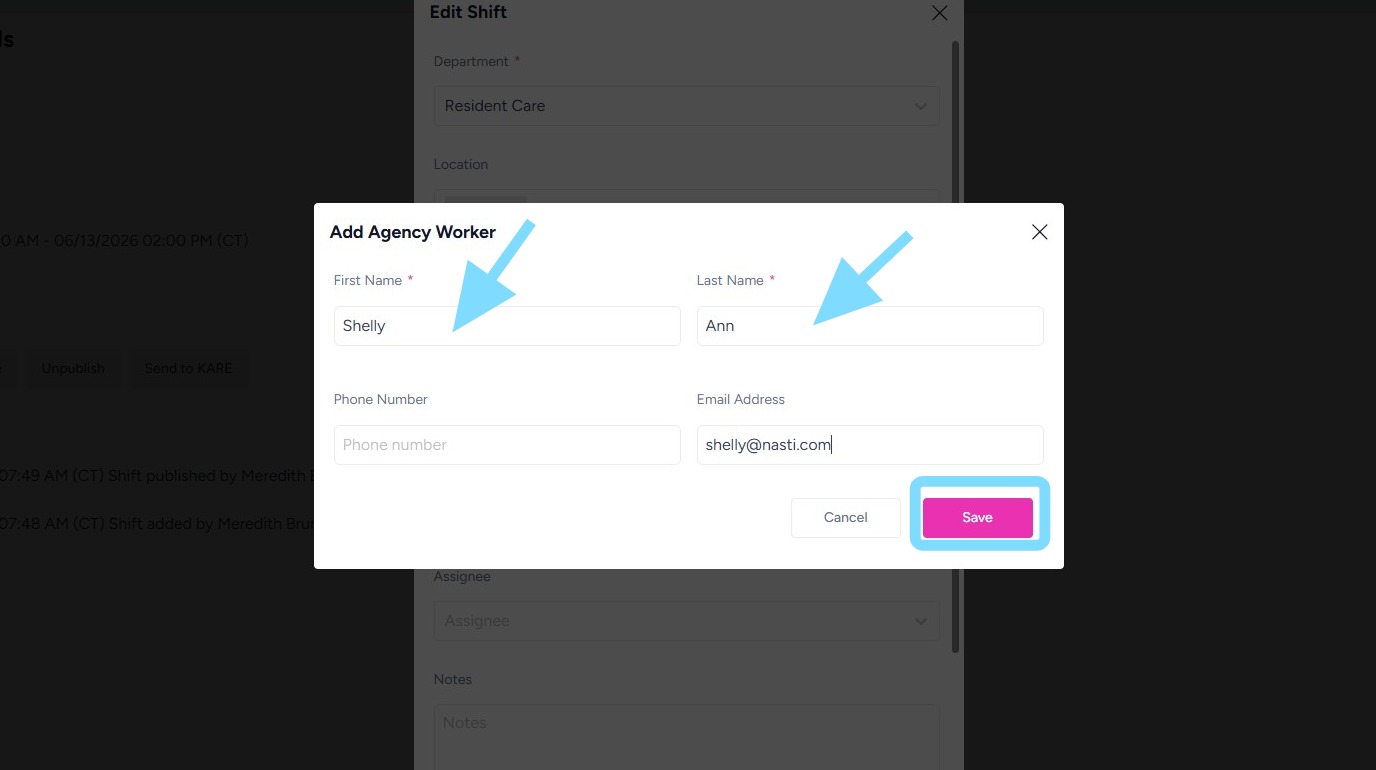
6. Enter agency worker information and select Save
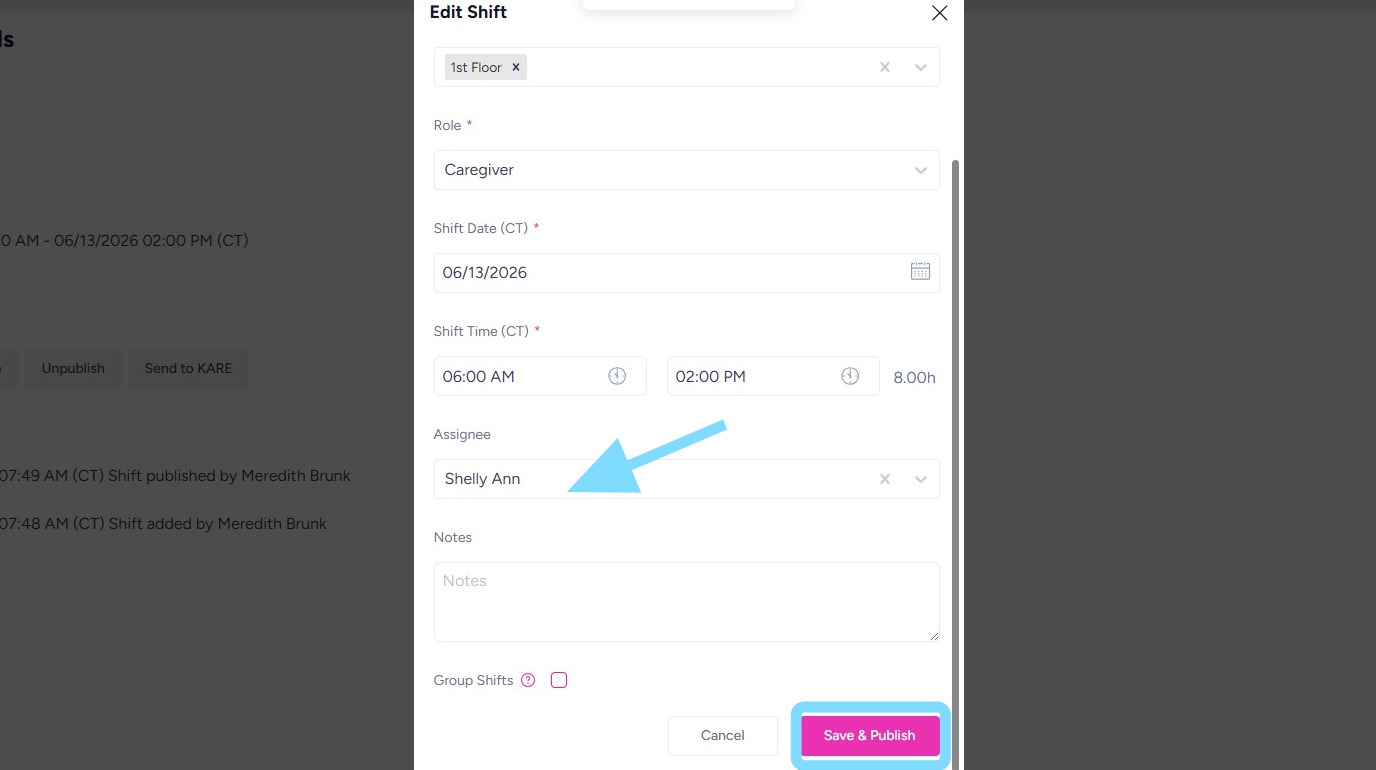
7. After selecting staff agency worker’s name or the agency within the Assignee box, select Save & Publish
8. The shift is now assigned to the selected agency and agency staff member. The assignment will be reflected on your schedule for visibility and tracking purposes.