How to Add a Role
This guide walks Admins through how to add and configure roles within NASTi so shifts can be assigned correctly within the schedule. Admins can define role details, assign colors for schedule visibility, set HPPD targets if needed, and assign employees to each role. Note: Admins must have Community Management permissions to add a role.
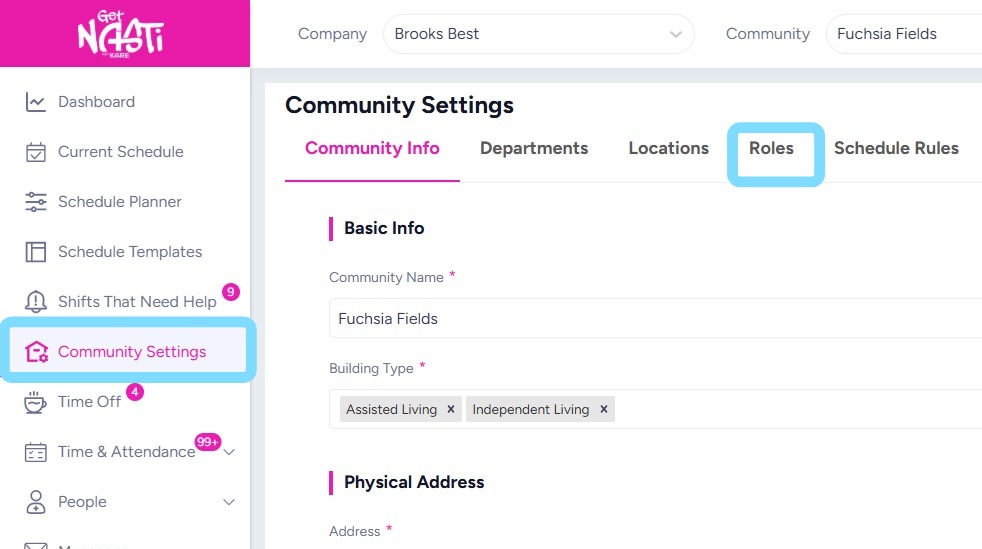
1. Navigate to Community Settings
Select Roles
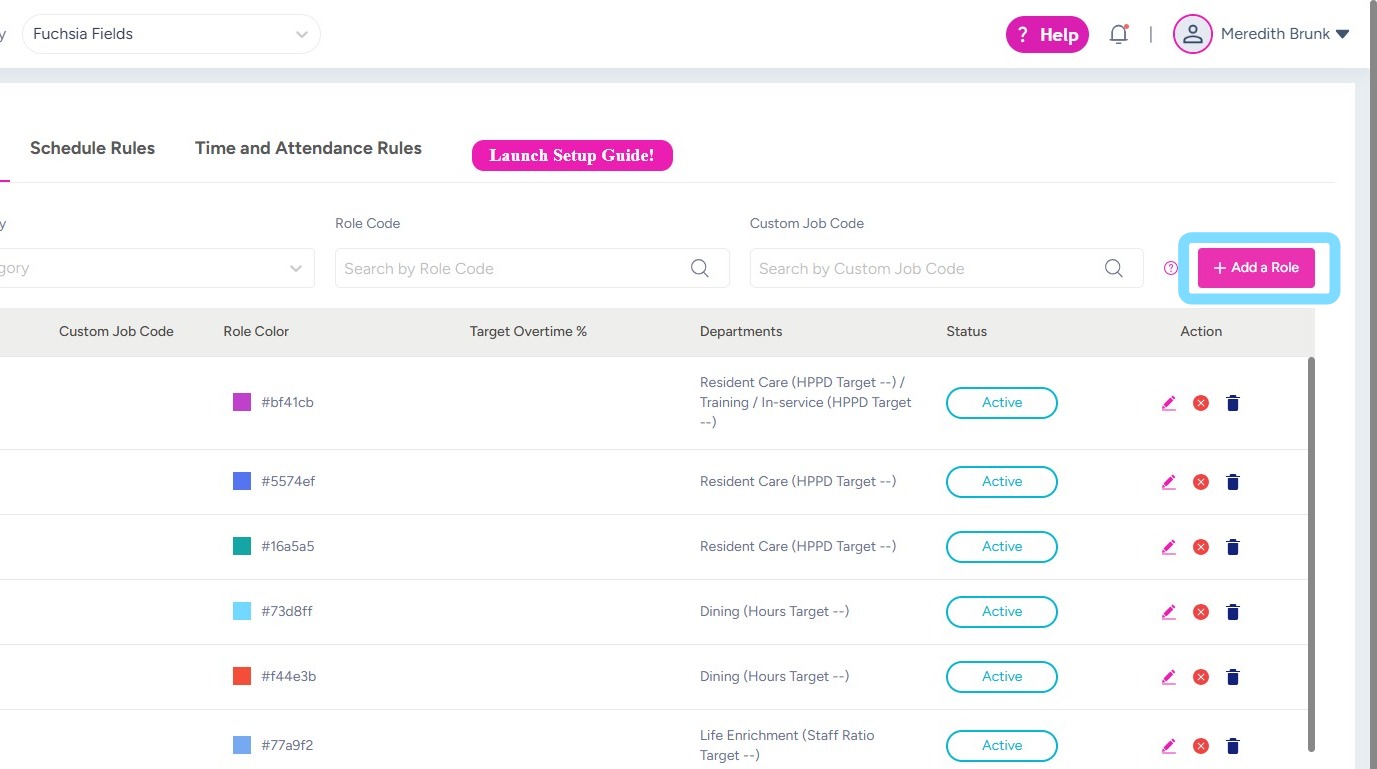
2. Select + Add a Role
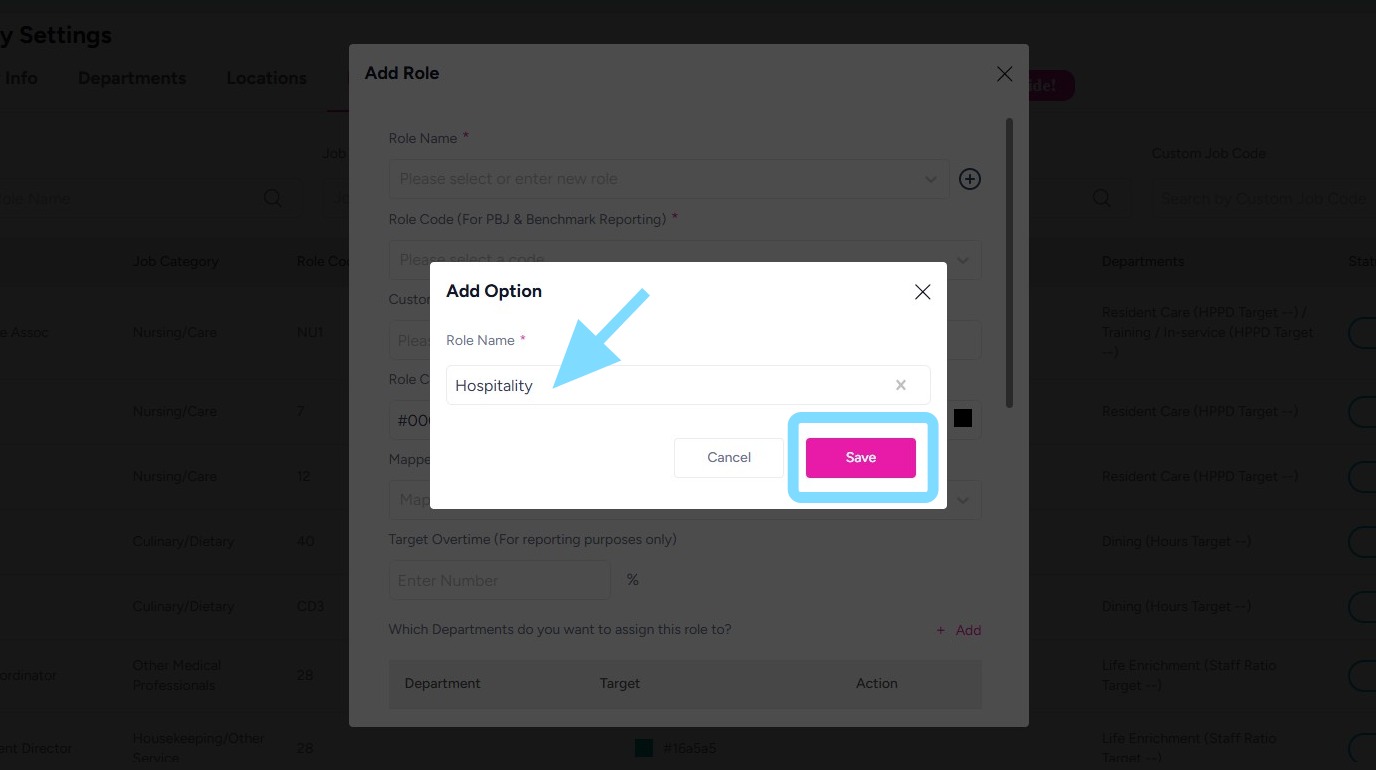
3. Select + to create the name of that role.
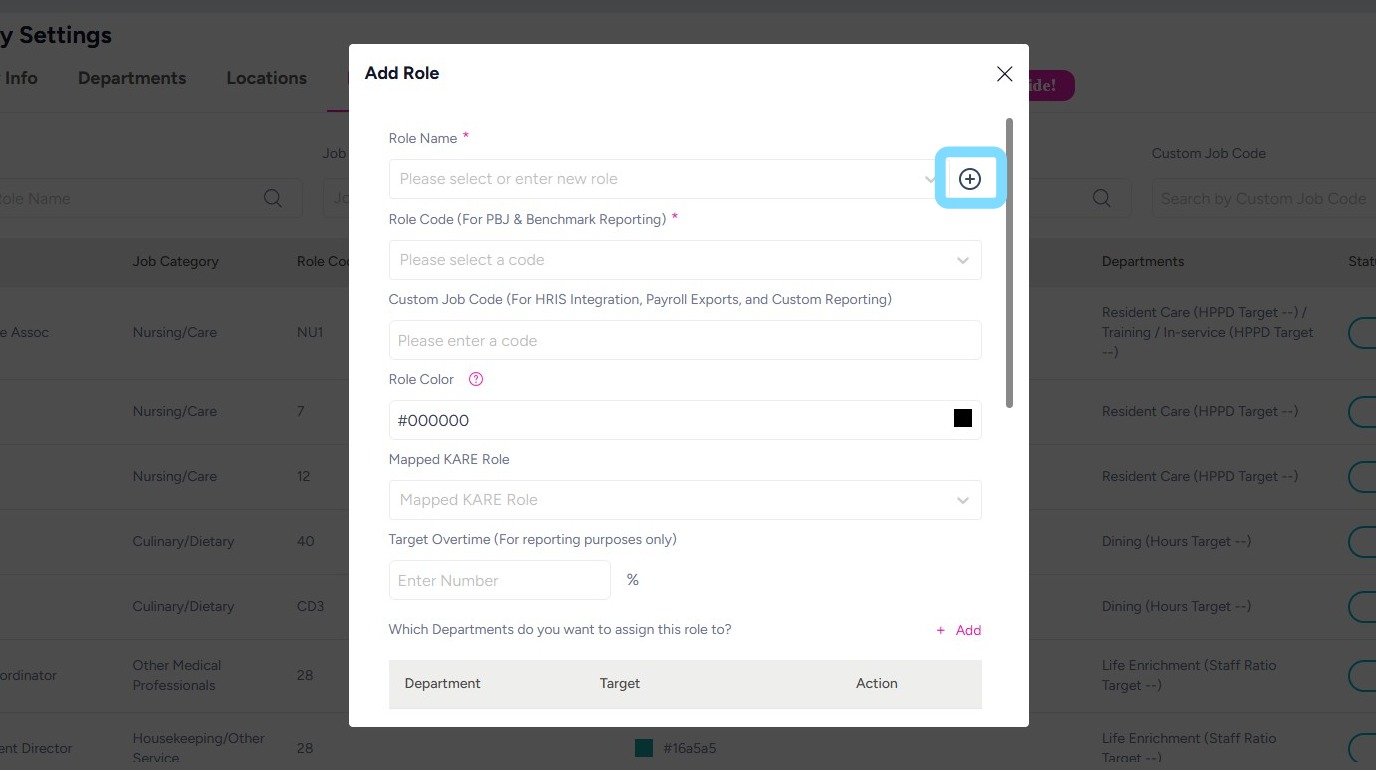
4. Enter name of role.
Select Save.
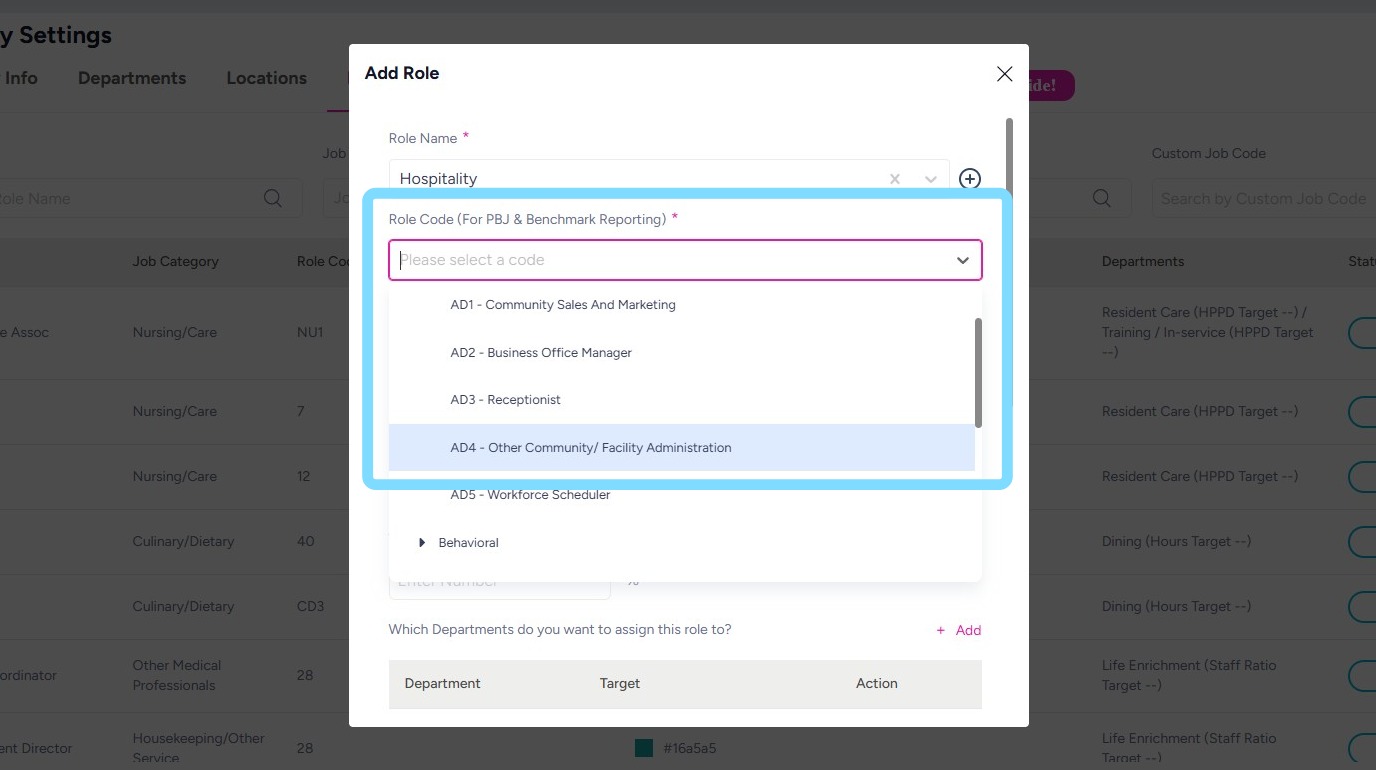
5. Select a corresponding Role Code from dropdown list.
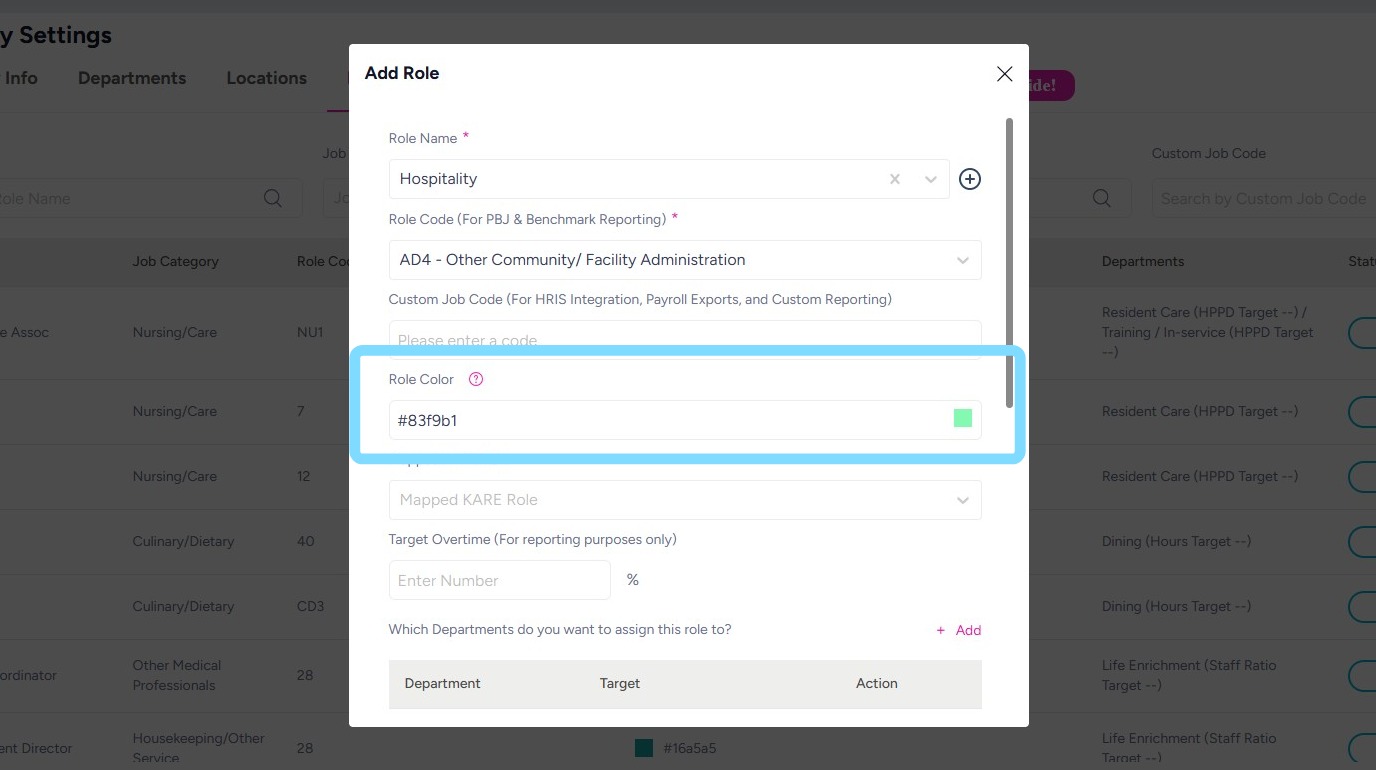
6. Choose a color for the role. The selected color will help visually distinguish this role within the schedule.
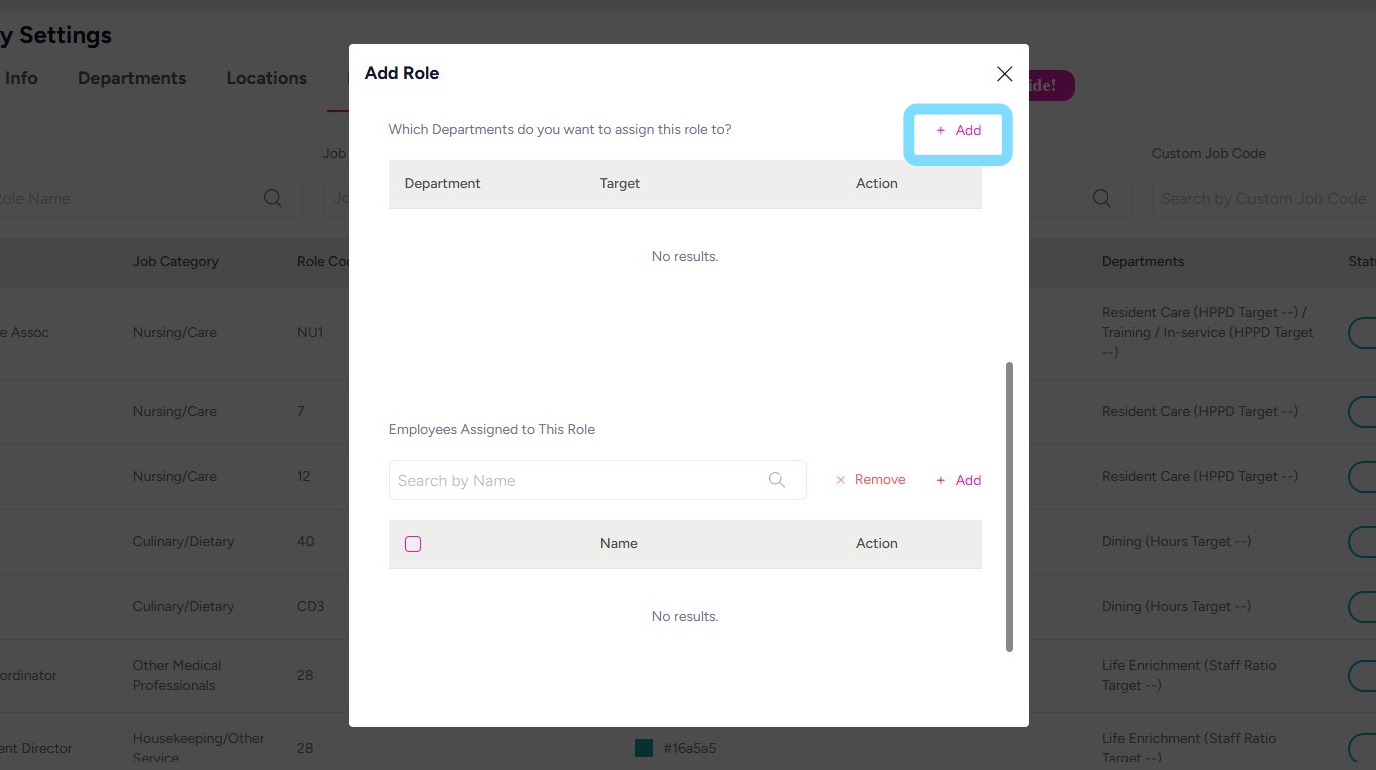
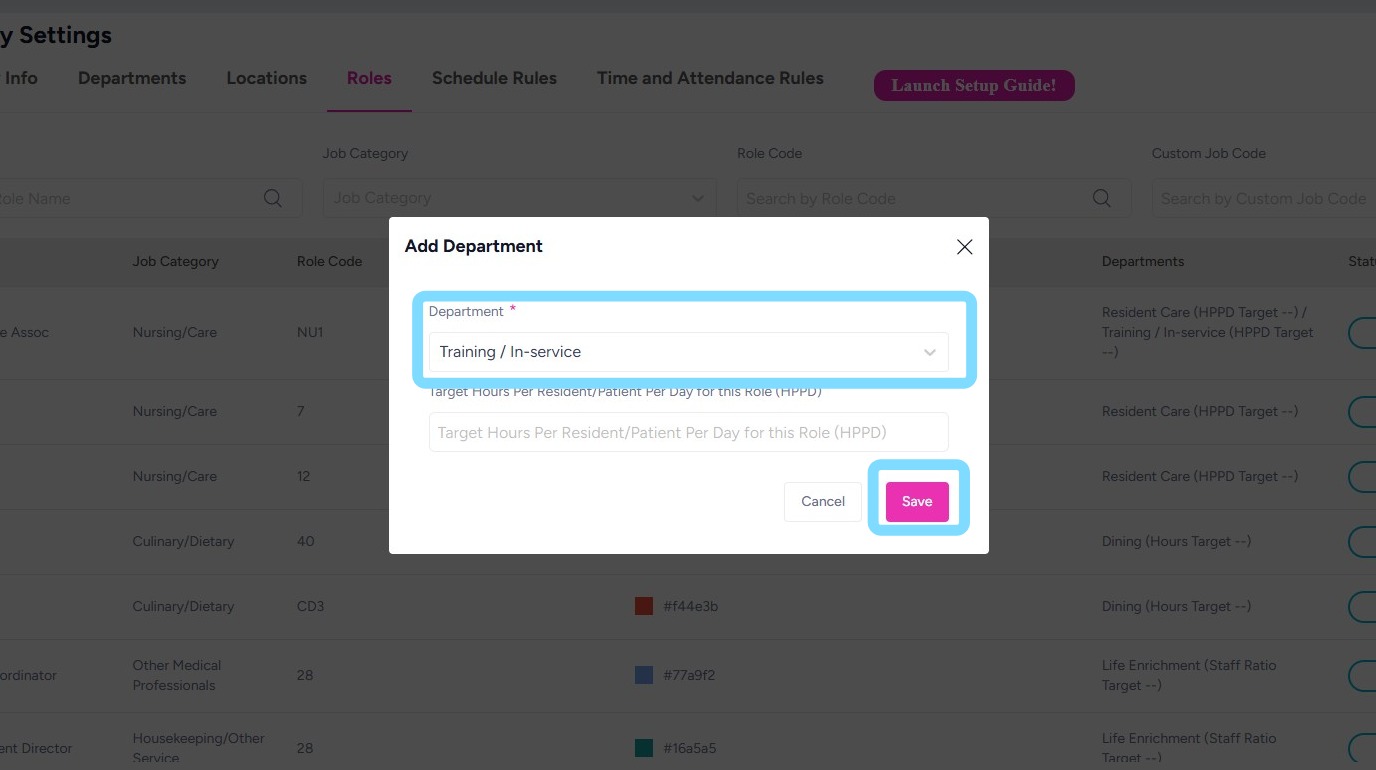
7. Assign the role to a department so it can be scheduled within that department’s schedule.
Select +Add
8. Select Department from dropdown list.
Select Save.
Note: If this role should be included in HPPD calculations on the schedule, enter the target HPPD hours for the role here.
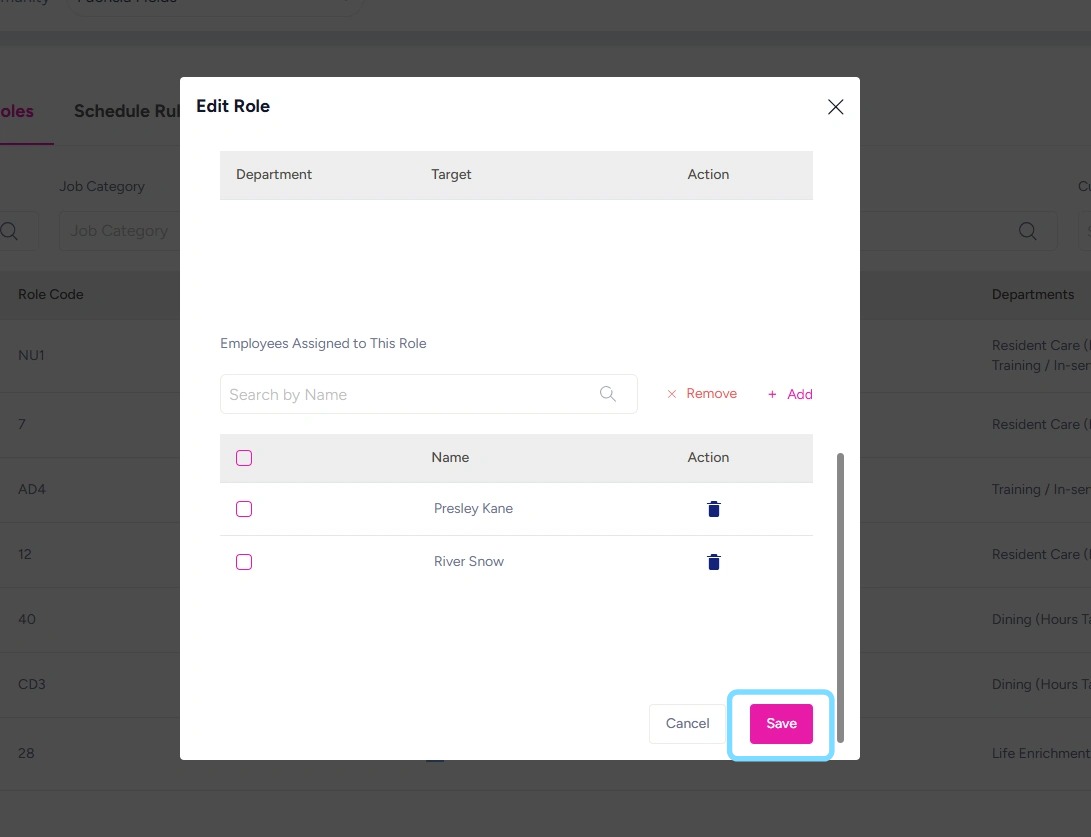
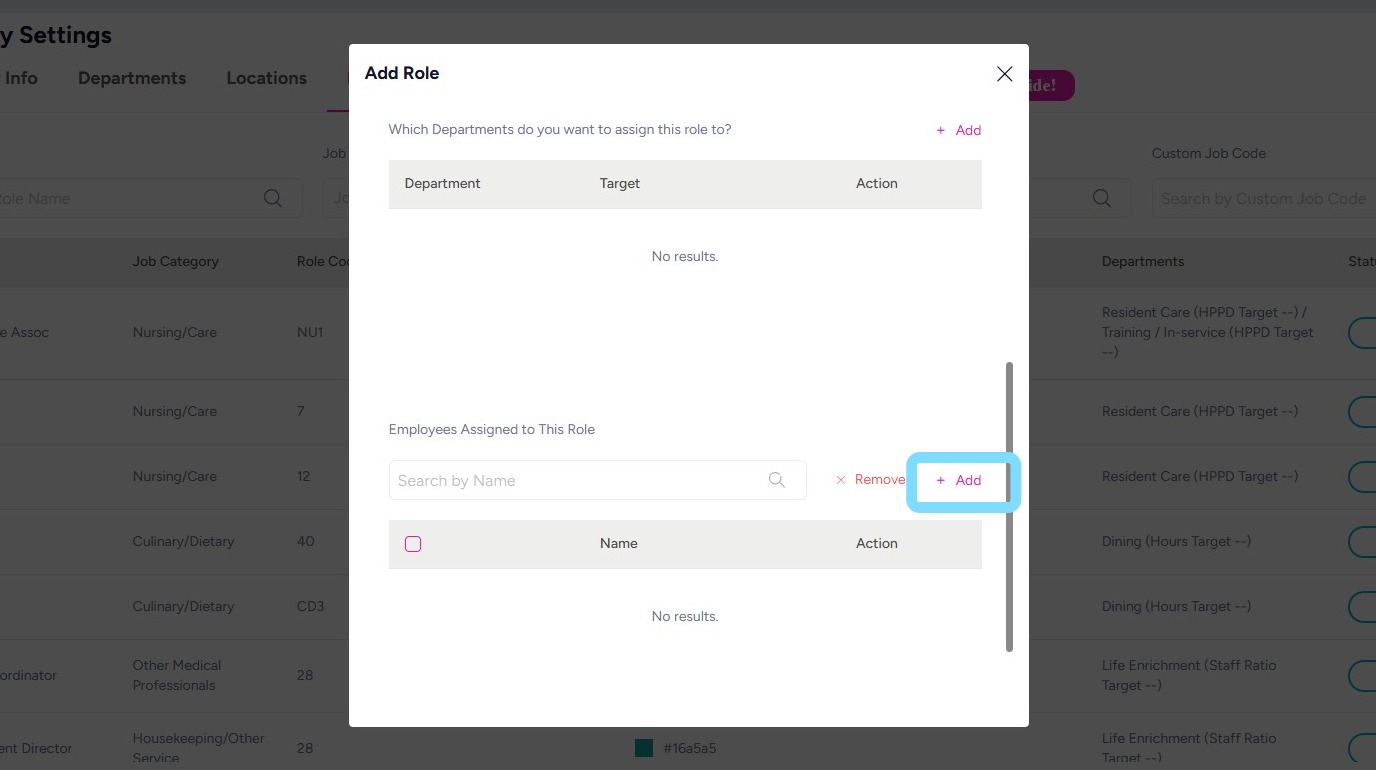
9. If employees are already loaded into NASTi with roles assigned, ensure they are also assigned to this new role.
Select +Add
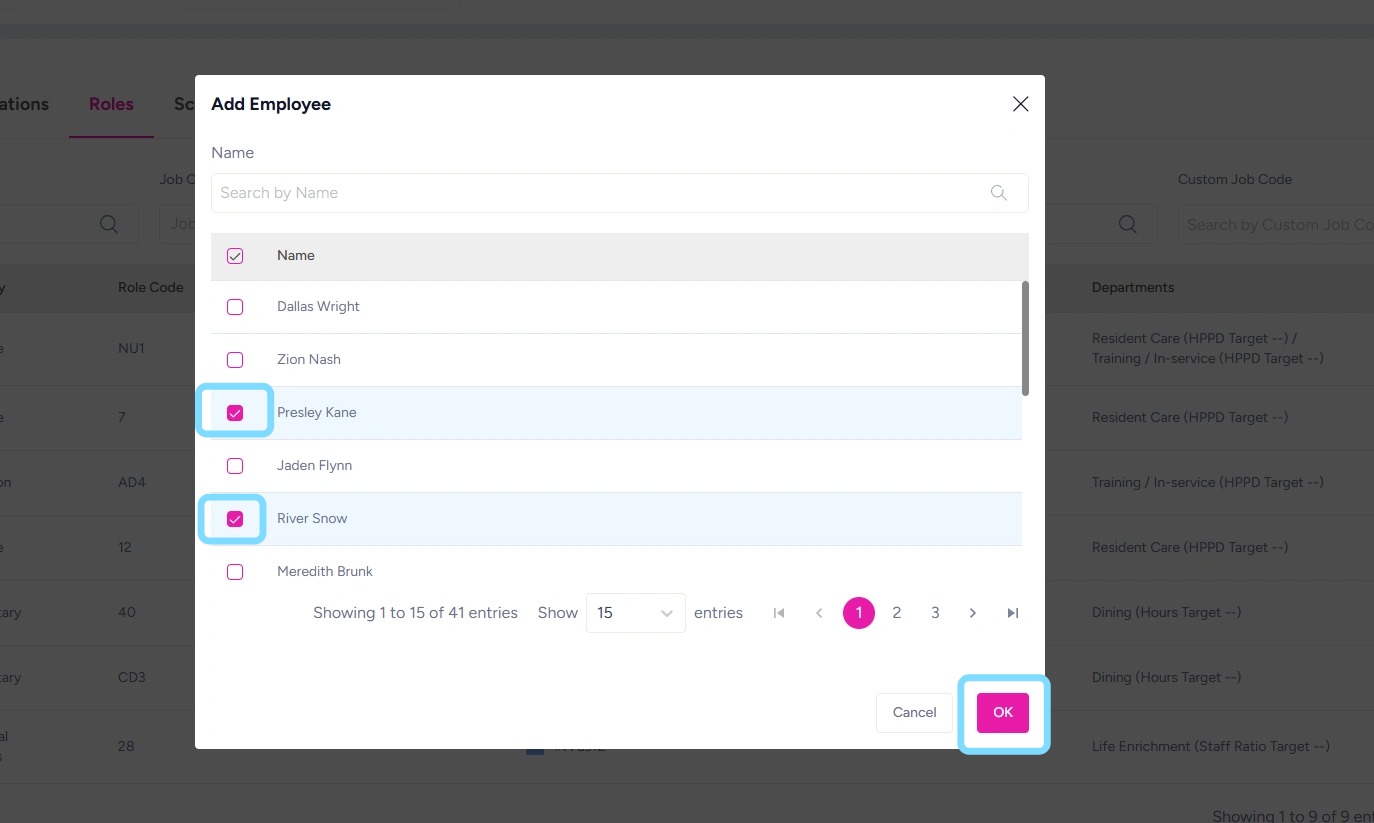
10. Select the checkboxes next to the employees to be added to this role.
Select OK.
11. Select Save.
Boom – you did it!! The new role is now available when creating shifts in the schedule.